Knead to Cook

Food & fitness obsessed girl.

  • Home
  • About me.
  • Recipes
    • Breakfast
    • Brunch
    • Snacks
    • Desserts
    • Vegan
    • Vegetarian
    • Gluten Free
    • Wheat Free
    • Evolution Power Yoga 40 Days
  • In the Media
  • Favorites.
  • Contact.

Tofu “beef”. Vegan and Gluten Free.

February 2, 2021 by Knead to Cook Filed Under: Gluten Free, Tofu, Vegan, Vegan proteins, Wheat Free

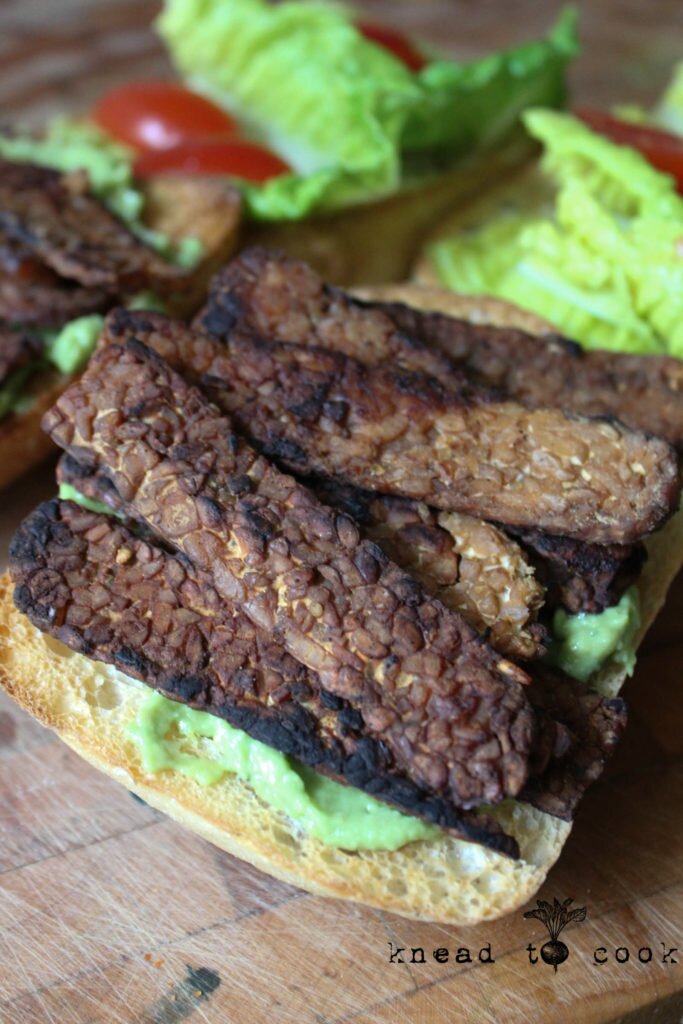
In the pursuit of reducing ultra processed vegan food, I’ve been making this tofu “beef” crumble for taco night since the beginning of January & even my tofu-hating father hasn’t realized this isn’t Beyond Meat crumbles. It’s very easy to make and works in a myriad of recipes from tacos, to chili right down to adding to a bowl. It’s a fun and different take on my traditional tofu I normally make. I hope you enjoy!

Ingredients:

1 block of extra firm tofu (I prefer Wildwood)
1 tablespoon of avocado or olive oil
1 tablespoon of liquid aminos
Skant 1 tablespoon chili powder
1 tablespoon of nutritional yeast
2 teaspoons of smoked paprika
1 teaspoon ground cumin
1 teaspoon of garlic powder
1/2 tsp salt (I used smoked salt)

Method:
Preheat your oven to 350 degrees. Spray with oil or line with a baking mat. Set that aside. Into a bowl add your oil through salt into a large mixing bowl. Whisk to combine. Remove the tofu from your package and drain the water. Carefully crumble the tofu into your mixing ensuring pretty small crumbles for optimal flavor. You can use your hands or a fork to break the tofu down. Again, add to the bowl and toss to coat. I allow it to sit for about 4-5 minutes to absorb all the sauce and flavor. Then you will add the crumbles to your prepared baking sheet and place in the oven. Bake for 12 minutes, give it a good stir and place back in for another 12 minutes or so. Remove and serve or store in an airtight container for up to 5 days.

~ox

— Knead to Cook

Veggie stir fry with peanut sauce.

January 26, 2021 by Knead to Cook Filed Under: Asian inspired, Beans, Gluten Free, Nuts, Pasta, Sauces, Vegan, Vegan proteins, Wheat Free

Oh good day sweet people! This is one of my favorite recipes and I’m excited to share it with you all. Quite flexible and super easy to prepare. Plus this peanut sauce… well you can use it on pretty much anything and everything. It’s heaven! In lieu of vegan chicken, you can use chickpeas, tofu or nothing at all and just do straight up veggies if you desire. Let’s get going!

Ingredients for Stir Fry:

1 tbl oil (I used a mix of toasted sesame and olive oil)
1 package of Sweet Earth mindful chicken or 1 can of chickpeas, drained
1 Bell Pepper, thinly sliced
2 cups of broccoli, I used frozen but fresh works well too, chopped into small florets
6 fresh spears of asparagus, chopped into 1.5 inch pieces
1/2 cup of edamame, again I used frozen
4 cloves of garlic, minced
*Use whatever fresh or frozen veggies you have on hand!

Method:
Into a sauté pan, add your oil and heat over medium heat. Add your vegan chicken and veggies and cook until tender. In the meantime, cook your noodles if using according to package instructions. Then start your sauce. This recipe moves fast!

Sauce ingredients:

Heaping 1/2 cup of creamy peanut butter
2 tbl of liquid aminos or soy sauce
2 tbl of maple syrup
2 tbl chili paste
1 tbl toasted sesame oil
1 tbl of apple cider vinegar
Juice from half a lime
2 inch nub of fresh ginger, peeled and grated
4 cloves of garlic, minced
Water as needed to thin the sauce to your preference. Start with 1/4 cup of water and add a small amount as necessary.

Optional toppings:
Red pepper flakes
Cilantro leaves
Sesame seeds
Peanut Sauce

Into a bowl, add all of your ingredients to a small saucepan over low heat. Whisk to combine. You’ll need to add water to thin the sauce out as needed. I kept adding water to achieve a thinner sauce but its to your preference.

Plating:
I added noodles to the bottom of my plate. Added the stir fry veggies and chicken then drizzled with sauce. A lot of it!

Can’t wait to hear what you think of this gem! ~ox

— Knead to Cook

Easy homemade granola. Vegan & GF.

January 19, 2021 by Knead to Cook Filed Under: Breakfast, Brunch, Gluten Free, Holiday Baking Ideas, Snacks, Vegan, Vegan proteins, Wheat Free

Granola is one of those things we mindlessly buy but can easily make and YES a healthy, not-sugar laden version. My recipe below is flexible and totally customizable to what you have on hand in your pantry and what you love. So let’s get started 🙂

Ingredients:
3 cups of rolled oats (I prefer One Degree as they are certified glyphosate free because no one wants to eat Round up!)
2 cups of your favorite nuts
1 cup of large coconut flakes
1/2 cup of your favorite seeds (I used hemp, sunflower and chia)
4 tbl of oil of your choice (walnut, avocado, coconut or olive)
4 tbl of maple syrup
1 tbl of ground cinnamon (Ceylon is best)
Pinch or two of a coarse salt
Optional: Dried fruit* see notes.

Method:
Preheat your oven to 325 degrees. Line a baking sheet with a silpat or parchment paper.
Into a large mixing bowl, add all of your ingredients and stir really well. Spread the mixture out on your baking sheet and place in the middle rack of your oven. I bake for 45 minutes or so or until golden, stirred every 15 minutes or so. Remove from the oven and allow to cool completely before storing.
*If you wish to add dried fruit, add it to the cooled granola before storing.

I used a combination of spicy maple syrup and classic.
Store in an airtight container or a glass jar with a lid for optimal freshness.

Hope you try this one out and put your own twist on it! Let me know how it turns out. ~ox

— Knead to Cook

Crispy Baked Spicy Tofu. The best. Vegan & GF.

January 12, 2021 by Knead to Cook Filed Under: Asian inspired, Gluten Free, Tofu, Vegan, Vegan proteins, Wheat Free

Good day sweet friends! Today for my food prep I finally decided to document my go-to spicy baked crispy tofu cubes. I haven’t made this in about 2 months… with the move, cooking wasn’t a priority. I go back to work this week and I wanted to fill my fridge with tons of easy and quick meal ideas.

Okay less ramblings… let’s get to this!

Ingredients:
2 extra firm blocks of Wildwood tofu (drained and no need to press)
1/4 cup of liquid aminos
1 tbl of avocado or whatever oil you prefer
Depending on your spice preference, use 2 tbl to 1/4 cup of spicy chili paste (I get mine at Target or the Asian market)
1 tbl of smoked paprika
2 tbl of cornstarch
4-6 cloves of chopped garlic
1 nub of fresh ginger, peeled and finely diced

Method:

Preheat your oven to 400 degrees. Get a baking sheet ready to go. This is one of those toss it all in the bowl and mix. I add all of the sauce/marinade components and whisk. Then I cube my two blocks of tofu. Add to the bowl and toss to coat ensuring the cornstarch powder is blended well.

Once your oven is preheated, with a slotted spoon remove the tofu (attempting to drain as much of the marinade as possible) and add the tofu to your baking sheet.

Bake for 25-30 minutes tossing occasionally. The edges should be golden brown and crispy yet a soft interior. Remove and allow to cool completely before putting in an airtight container with a lid for storage in the fridge.

I add these cubes to power bowls, salads, pastas or eat straight out of the container. I hope you enjoy!

~ox

— Knead to Cook

Mushroom recipe for those who hate mushrooms.

January 6, 2021 by Knead to Cook Filed Under: Brunch, Gluten Free, Vegan, Vegan proteins, Wheat Free

I’m not a mushroom fan however I know the vast benefits to them. Vitamin D source. They contain two high concentrations of powerful antioxidants are known to support keeping us young! These powerhouses, ergothioneine and glutathione, are also known to protect against Alzheimer’s and Parkinson’s diseases in a recent study conducted by Penn State University. They support your heart and your mind. Can assist in bone strength. And they support your energy levels. Now to get over that texture thing…

We moved! We downsized much of last year and decided to sell our house and move into the city. I’ll cover this in the future in a multiple post series but for now, we are settled and a local restaurant/adaptogenic coffee/tea joint in my neighborhood was teaming up with a local mushroom farmer to offer shares to pick up. I jumped at the chance. New year… I’m working on eating more mushrooms for my health. I venmo’d the farmer & last Saturday picked up my share of mushrooms. One pound to be exact. We had oysters, chestnut, lion’s mane… and others that I don’t know or remember. But here’s a pic of all of their glory!

I mean come on… they’re beautiful! Okay so my recipe is a loose version meaning add more or less spice. It’s a very flexible process. Let’s go!

Ingredients:
1 pound of mixed mushrooms, chopped fairly thin (think thinner – crispier)
1 tbl of a neutral oil, I used avocado
1-2 tbl of a spice blend you love – I used a fancy old bay inspired seafood spice blend
Pinch of salt
2 tsp of liquid smoke

Method:
Heat a good, thick pan – I used cast iron with the oil you prefer, over the flame to get it quite hot. CAREFULLY add your mushrooms avoiding spatter as much as possible. I cannot stress this enough. I add the seasoning mid way through cooking. And again, go heavier or lighter depending on your spice level you prefer. I’m normally very heavy handed. I cooked, for several minutes before stirring. Repeat until the mushrooms are cooked down a lot. I probably cooked them for 12 minutes or more. The edges get very crispy. Then add the liquid smoke. Cook for another 3-4 minutes. Then remove from heat and allow to cool in the pan. Now taste test and if they need more time, cook longer. I added these to pasta, to my salad… just snacked on them. So damn good! One word of advice, don’t store in a container, just put in a bowl and store without a lid. They soften a lot when a lid is placed on them. If you need to re-crunch them back up day 2 (yes I know re-crunch isn’t a word) add them to your air fryer at 350 for 4 minutes.

— Knead to Cook

Easy stuffed zucchini boats. Vegan.

September 15, 2020 by Knead to Cook Filed Under: Brunch, Gluten Free, Lentils, Vegan, Vegan Burgers, Vegan proteins, Wheat Free

Good day fine people! I’m on a staycation this weekend as our trip to Scandinavia clearly wasn’t happening amid a global pandemic. So day trips, socially distanced is where we’re at. Lots of hiking with the dogs. Peloton riding. Lots of movement and time outdoors.

Our garden is still producing quite a bit and I whipped up some stuffed zucchini boats for dinner on Sunday and I thought I’d share. These can be stuffed with lentils, meat (if you eat it) or a vegan meat alternative that you have on hand. I had 2 vegan burgers that I used in this for 6 stuffed zucchinis.

Ingredients:

2 burgers (If using lentils or another protein – I used enough for 3 people to eat). Leftovers can easily be thrown into a protein bowl, marinara etc. The size of your zucchinis will vary a lot so this recipe is very flexible.
2 large zucchinis, halves and hollowed out (use a spoon) so there is room for the filling
1/4 of a onion, diced
6 cherry tomatoes, halved
1/2 of a bell pepper, diced
1/2 of a jalapeño, seeds removed
You can add whatever vegs you have on hand, just dice up finely and add.
1-4 cloves of garlic, minced
1 tsp each of salt, smoked paprika and garlic powder
You can also add some rice or quinoa if you have leftovers (about 1/3 cup)
Topping: vegan cheese for topping

Method:

Preheat your oven to 375 degrees. Decide on your cooking vessel, I was roasting other veggies so I used a baking sheet but a casserole dish or whatever will hold all of the boats. Set that aside.

Into a skillet, add your onion and cook for about 4 minutes until golden. Add the remaining ingredients through spices. Stirring often. Cook until softened. If using a grain of choice, add that to your sauté pan to mix through the filling.

Prepare your zucchini by scraping out the center with a spoon creating a well that you will fill. Then spoon your filling into each boat.

Place the filled zucchini on the baking sheet. Repeat until all are filled. Top with as much cheese as you prefer. Bake for about 15-20 minutes. The cheese should be nicely melted and the zucchini softened.

Enjoy and leftovers can be stored in an airtight container. Reheat and enjoy for future lunches or dinners.

~ox

— Knead to Cook

The easiest crunchy baked tofu.

August 25, 2020 by Knead to Cook Filed Under: Air Fried, Brunch, Evolution Power Yoga 40 Days, Gluten Free, Vegan, Vegan proteins, Wheat Free

Good morning sweet people! Last week, before my latest and greatest knee procedure, I experimented with making some crunchy baked tofu and it came out so good – I had to share. I’ve made 2 batches & my husband & I cannot get enough. You can easily prepare in a sauté pan, bake or even air fry. Even the leftovers are insanely good! I add to my salads pretty much daily. And I’ll proclaim the wonders of this specific brand of tofu. If you cannot locate it, you must purchase an extra firm block of tofu. That’s key!

Ingredients:

1 block (if you are making more just double or triple the recipe) of Wildwood extra firm tofu, sliced into 8 or 10 “steaks”
1/3 cup of dijon mustard
1/2 cup of cornmeal
1 tsp of smoked paprika
1 tsp of garlic powder
1 tsp of salt
1 tsp cayenne or chili powder (whichever you prefer)

Method:

Take a baking sheet lined with either a Silpat or parchment and set that aside. If baking, preheat the oven to 375 degrees.

I remove the tofu from it’s package and set on a paper towel before slicing. You don’t need to press this tofu. Slice and set aside.

Into a larger mixing bowl add your cornmeal, paprika, garlic, salt and cayenne or chili powder. Whisk to combine.

On my cutting board I laid out all of the tofu slices and with a pastry brush – brushed a thin layer of dijon on the one side of the tofu. I carefully placed the coated side down into the cornmeal mixture. While that’s down, brush the dijon on the other side and flip. Place the coated tofu on the baking sheet and repeat until everything is coated. Depending on the thickness of your coating (dijon) you may need more or less. I was pretty thin with it.

I sprayed the upward side with a bit of avocado oil. If baking, bake for about 12-14 minutes then flip. Cook for another 8-10. Remove and serve or store when completely cooled, in an airtight container in the fridge. When I go to reheat I will pop in the air fryer for about 6 minutes at 350 degrees.

I also eat these cold.

If air frying, I would go for 6-7 minutes at 375 degrees and flip. Keep a watchful eye. I feel like every oven and air fryer is so inaccurate with temps.

If you prefer to make this in cubed form, I would suggest slicing the tofu into cubes. Into a large bowl add your dijon and thin out a tiny bit with water. Add your tofu cubes and toss to coat. Then spoon in batched, into your cornmeal mixture. Then spoon onto your baking sheet. Bake for less time, but toss often to ensure even baking.

I apologize for not having pics of the dredging but I was alone and I needed both hands. The next round of making these I’ll recruit Bill to help.

Enjoy!

~ox

— Knead to Cook

Healthy Broccoli Slaw (no mayo).

July 21, 2020 by Knead to Cook Filed Under: Brunch, Evolution Power Yoga 40 Days, Gluten Free, Holiday, Party Foods, Raw, Salads, Side dish, Vegan, Vegan proteins, Vinaigrette, Wheat Free

My husband picked up a bag of broccoli slaw from Trader’s and I wanted to take a stab at a non-mayo (vegan, of course) version. I knew I wanted to pair this with a jackfruit carnitas sandwich and it was perfect! A nice crunchy cold side with a hot sammy.

Let’s get to it!

Ingredients:

1 bag of your favorite cole slaw or veggie slaw mix (I used broccoli)
1/4 cup of a good quality olive oil (you can use a scant amount and add a tablespoon of sesame oil if you prefer)
3-4 tablespoons of your chosen acid (lemon, lime juice or I used apple cider vinegar, champagne or even rice wine vinegar works)
1 tsp smoked paprika
1 tsp ground cumin
Salt and pepper to taste

Optional:
Add some fresh cilantro
sesame seeds (I garnished with that)
sliced jalapeños

Method:

I take a big bowl and make my dressing first, olive oil through salt/pepper. Whisk to combine. Then add your slaw mix and toss to coat. I allow this to rest and marinade in the fridge for at least 2-3 hours.

Before serving, toss again and garish as you please.


Enjoy!
~ox

— Knead to Cook

Chickpea Pasta Salad. Vegan.

July 2, 2020 by Knead to Cook Filed Under: 4th of July/Patriotic, Beans, Brunch, Dressings, Pasta, Salads, Side dish, Vegan, Vegan proteins, Vinaigrette

On the weekend, we were at one of our favorite little markets and I picked up a big bag of dried chickpeas. I soaked them overnight and cooked them on the stovetop the next day. They were so good! In this recipe post I’ll share how to make them and this delicious pasta salad – which is perfect for summer gatherings, weekly meal prep or whatever you have in mind. It’s completely flexible with what veggies and pasta you use and if you prefer, you can always use canned chickpeas.

Ingredients:

1-2 cans of chickpeas (drained and rinsed) OR
1 lb of dried chickpeas (soaked in cold water overnight)
1 box of your favorite pasta (cook per box instructions)
Fresh herbs (I used a palmful of fresh dill and parsley) washed and chopped
1/2 of a red onion, diced
1 large cucumber, chopped
2 bell peppers, chopped
1/3 cup of fresh peas
2 garlic scapes, chopped
Other veggies you can use: Raw asparagus (chopped), carrots, radishes, roasted red peppers, artichoke hearts, halved sugar snapped peas, chopped broccoli, olives etc. If I opt to use tomatoes, I add them prior to serving as they get super mushy in the fridge.

Vinaigrette:

1/2 cup olive oil
4 tbl good quality balsamic vinegar
5 cloves of garlic, (raw), minced
1 tbl of dijon mustard
1 tsp red pepper flakes
Pinch of salt and pepper

Method:
If using dried chickpeas, soak them in a large pot with enough water to cover by a few inches over the top. In the morning drain, and rinse. Add them to a stock pot and add enough water to cover with a good pinch of salt or two. Bring to a boil and then reduce heat and allow to cook for about 45-60 minutes taste testing for the texture you enjoy.

Once done, drain and allow to cool.

For the pasta salad, I cook my noodles according the package instructions. Drain and add to a very large mixing bowl. Add your veggies, chickpeas and herbs through garlic scapes if using. Toss to mix.

Into a glass jar that you have a lid for, add your vinaigrette ingredients and place the lid on tightly. Shake vigorously. Add 1/2 of that dressing to your pasta salad and toss. I reserve the remaining dressing to dress the pasta salad if not consuming immediately as the pasta absorbs some of the dressing.

This vinaigrette is also heavenly as a bread dip!

Wishing you a very and safe Happy 4th of July!

~ox

— Knead to Cook

TTLA Tempeh Tomato Lettuce Avocado Sandwich.

June 22, 2020 by Knead to Cook Filed Under: Snacks, Vegan, Vegan proteins

Let me begin by saying we are VERY late to the TTLA game & I’m not quite sure why. I mean we LOVE Whole Foods so…. we’re here & loving it!

This sandwich is perfect for lunch or dinner. And with summer tomatoes fresh from you garden?! Hello beautiful. This sandwich I used my leftover taco Tuesday guac but you can use sliced avocado as Whole Foods OG does. Okay, less chatting more cooking!

Ingredients:
1 package of Lightlife tempeh bacon
Some oil to spray the pan with (avocado is perfect)
Romaine
Fresh sliced tomatoes
Everything but the bagel seasoning
Guacamole or 1 avocado sliced
Vegenaise mayo
Ciabatta rolls, sliced and toasted

Method:

Begin by slicing and toasting your rolls. Set them aside. I heat up my cast iron pan pretty hot, spray with a small amount of oil and add my tempeh bacon. I normally cut the slices in half because they break while cooking normally. Flip after a few minutes of cooking and when they are nicely browned. Cook on the other side.

To assemble:

Take you roll and add a schmear of guac (if using) on one slide and mayo on the other half.
If using slices of avocado, just add them here.
I add mayo to the other slice and top with everything but the bagel seasoning.
I add 2 Romaine leaves to either side of the bread and add tomato slices on top of that.
Pair it up with a pickle and your favorite chips and you’re set! This recipe normally yield 3 sandwiches.

Enjoy!

~ox

— Knead to Cook

  • « Previous Page
  • 1
  • 2
  • 3
  • 4
  • …
  • 40
  • Next Page »
twitter  pinterest  instagram  mail  rss
welcome
Get Post via Email

my foodgawker gallery

Recent Posts

  • Air fried banana peel bacon.
  • 1857 city home aesthetic. Home decor. Empty nesting. Primary bedroom & bathroom.
  • How to build the perfect grain bowl.
  • Single serving chia pudding. Vegan & GF.
  • Antioxidant-Packed Protein Smoothie without banana

Categories

  • 4th of July/Patriotic
  • 5 favorite things…
  • Air Fried
  • Appetizers
  • Asian inspired
  • Awards.
  • Beans
  • Beef
  • Best Vegan…
  • Beverages
  • Breads
  • Breakfast
  • Brownies
  • Brunch
  • Cabot Fit Team
  • Cakes
  • Candy
  • Cheese
  • Chicken
  • Chili
  • City living
  • Cocktails
  • Condiments
  • Cookies
  • Crock Pot
  • Desserts
  • Dips
  • Dressings
  • Easter
  • Egg dishes
  • Evolution Power Yoga 40 Days
  • Featured
  • Fish
  • Fitness.
  • Friday Favorites Series
  • Frozen Pops
  • Fruit
  • Gift ideas
  • Giveaway!!!
  • Gluten Free
  • Going and Living Vegan
  • Grilling
  • Grilling/Rubs/Sauces
  • Ground Turkey
  • Halloween
  • Health & wellness
  • Holiday
  • Holiday Baking Ideas
  • Holiday Gift Guides
  • Homemade Chips
  • Ice cream
  • Indian-inspired.
  • Italian-inspired
  • Knead to Cook Promotions
  • Lentils
  • Life.
  • Lucy Let's Go Post
  • Mexican
  • Muffins
  • My story.
  • No bake/cooking required!
  • Notable mentions.
  • Nuts
  • Pantry
  • Party Foods
  • Pasta
  • Pies
  • Pizza
  • Popcorn
  • Pork
  • Potatoes
  • Pressure Cooker
  • Product Review.
  • Quick Bread
  • Raw
  • Rubs
  • Running/Races
  • Salads
  • Salsas & Guacamole
  • Sauces
  • Seafood
  • Side dish
  • Smoothies
  • Snacks
  • Soups
  • Sponsored
  • St. Patrick's Day
  • Stews
  • Stocks/Broths
  • Thanksgiving
  • Tofu
  • Travel & eating
  • Turkey
  • Valentine's Day
  • Vegan
  • Vegan Burgers
  • Vegan proteins
  • Vegetarian
  • Vinaigrette
  • Vitamix
  • Wheat Free
  • Yogurt
  • Your Life Edit Foundations
  • Zoku Popsicles
my foodgawker gallery
my photos on tastespotting
BEST Food Blogger Recipes
POPSUGAR Select Food POPSUGAR Select PLUS
Foodista Food Blog of the Day Badge
my healthy aperture gallery
My Menu On Honest Cooking
[alpine-phototile-for-instagram id=972 user="knead_to_cook" src="user_recent" imgl="instagram" style="cascade" col="3" size="M" num="9" curve="1" align="center" max="100" nocredit="1"]
iGourmet.com

<a href=”http://www.pntrac.com/t/SEFHRkZMR0xBTURISkdBTUlNREc”><img src=”http://www.pntrac.com/b/SEFHRkZMR0xBTURISkdBTUlNREc” border=”0″ width=”199″ height=”547″ title=”Caudalie Exclusive Premier Cru GWP” alt=”Caudalie Exclusive Premier Cru GWP”></a>

Quick Links

  • Home
  • About me.
  • Recipes
    • Breakfast
    • Brunch
    • Snacks
    • Desserts
    • Vegan
    • Vegetarian
    • Gluten Free
    • Wheat Free
    • Evolution Power Yoga 40 Days
  • In the Media
  • Favorites.
  • Contact.

Archives

  • May 2021
  • April 2021
  • March 2021
  • February 2021
  • January 2021
  • November 2020
  • October 2020
  • September 2020
  • August 2020
  • July 2020
  • June 2020
  • May 2020
  • April 2020
  • March 2020
  • February 2020
  • January 2020
  • December 2019
  • November 2019
  • October 2019
  • September 2019
  • August 2019
  • July 2019
  • June 2019
  • May 2019
  • April 2019
  • March 2019
  • February 2019
  • January 2019
  • December 2018
  • November 2018
  • October 2018
  • September 2018
  • August 2018
  • July 2018
  • June 2018
  • May 2018
  • April 2018
  • March 2018
  • February 2018
  • January 2018
  • December 2017
  • November 2017
  • October 2017
  • September 2017
  • August 2017
  • July 2017
  • June 2017
  • May 2017
  • April 2017
  • March 2017
  • February 2017
  • January 2017
  • December 2016
  • November 2016
  • October 2016
  • September 2016
  • August 2016
  • July 2016
  • June 2016
  • May 2016
  • April 2016
  • March 2016
  • February 2016
  • January 2016
  • December 2015
  • November 2015
  • October 2015
  • September 2015
  • August 2015
  • July 2015
  • June 2015
  • May 2015
  • April 2015
  • March 2015
  • February 2015
  • January 2015
  • December 2014
  • November 2014
  • October 2014
  • September 2014
  • August 2014
  • July 2014
  • June 2014
  • May 2014
  • April 2014
  • March 2014
  • February 2014
  • January 2014
  • December 2013
  • November 2013
  • October 2013
  • September 2013
  • August 2013
  • July 2013
  • June 2013
  • May 2013
  • April 2013
  • March 2013
  • February 2013
  • January 2013
  • December 2012
  • November 2012
  • October 2012
  • September 2012
  • August 2012
  • July 2012
  • June 2012
  • May 2012
  • April 2012
  • March 2012
  • February 2012
  • January 2012
  • December 2011

Copyright © 2021 · Swank WordPress Theme By, PDCD