Knead to Cook

Food & fitness obsessed girl.

  • Home
  • About me.
  • Recipes
    • Breakfast
    • Brunch
    • Snacks
    • Desserts
    • Vegan
    • Vegetarian
    • Gluten Free
    • Wheat Free
    • Evolution Power Yoga 40 Days
  • In the Media
  • Favorites.
  • Contact.

Oatmeal Fiber Energy Balls.

April 30, 2013 by Knead to Cook Filed Under: Breakfast, Cookies, Gluten Free, No bake/cooking required!, Snacks, Vegetarian 11 Comments

164898_10200585464552087_1478225504_n

I think I could survive on energy balls.  Any recipe… whatever the flavor.  I heart them all.  Hey, we all have our thing, right?  I bought some fiber cereal at the grocery store and thought I would whip up a few recipes using the cereal. The fact is, we all need fiber to keep things moving in the right direction (gross, but true!).  These are super delish and already my kids are downing these little treats fast and furiously.

Ingredients:

1 cup of old fashioned rolled oats (I use gluten free organic)
2/3 cup of toasted coconut flakes
1/2 cup of nut butter (almond, peanut – whatever you have on hand)
1/3 cup of agave, maple syrup or honey
1.5 teaspoon vanilla extract
1 tablespoon of protein powder (I used vanilla Designer Whey)
1/4 cup of fiber cereal
Chocolate chips (I used dark chips) – amount is up to you 1/4 to 1/2 cup

Directions:

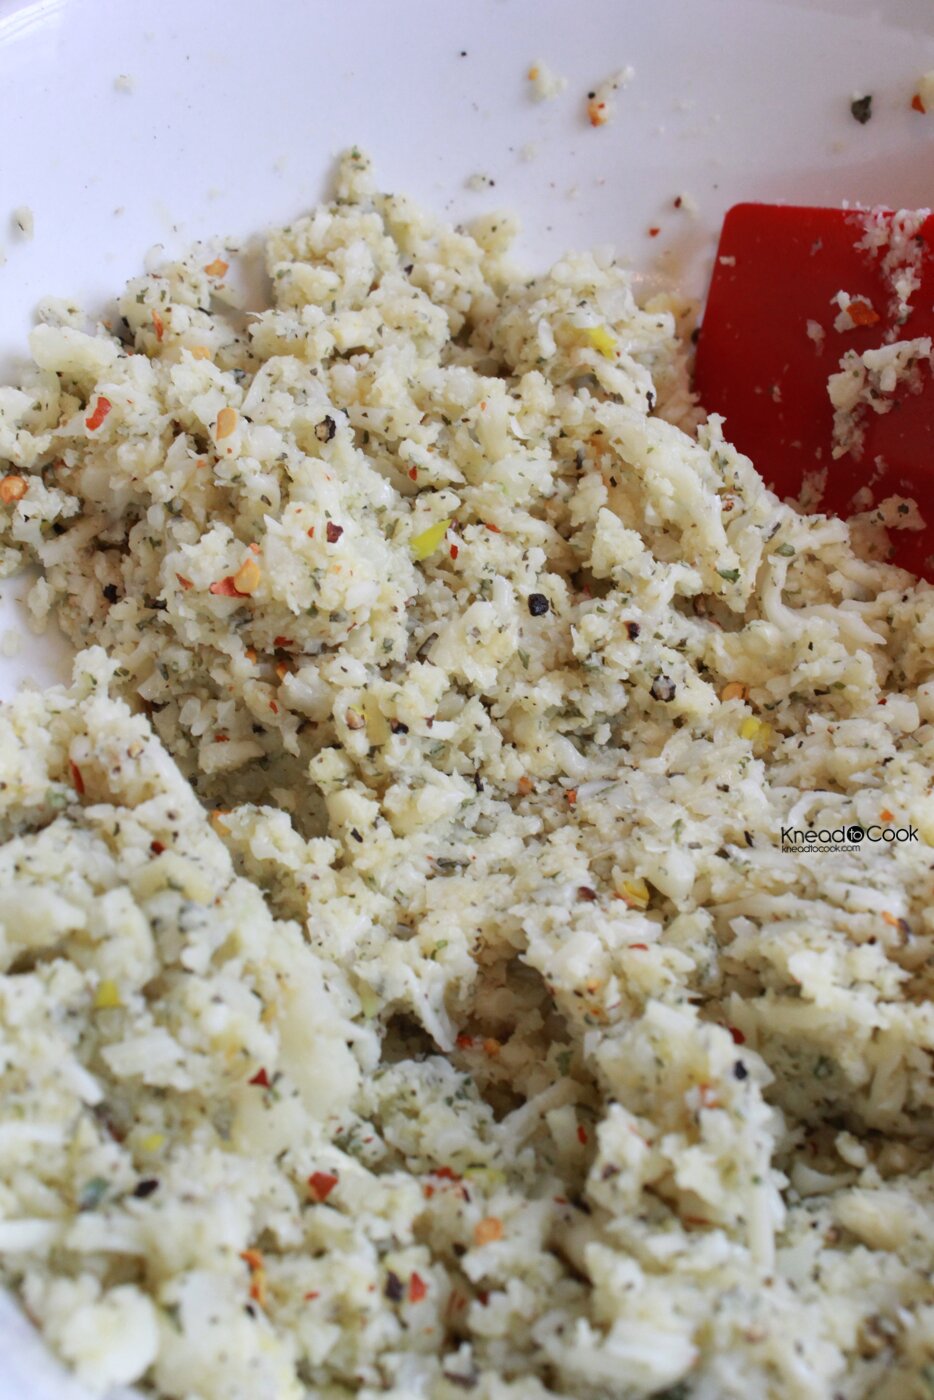
Combine all ingredients into your stand mixer or large bowl.  Blend.  Refrigerate for at least 30 minutes to one hour.  Scoop out with a small melon baller.  Store in the fridge or freezer.  Watch the magic – they disappear!

— Knead to Cook

Roasted Red Pepper & Garlic Hummus.

April 25, 2013 by Knead to Cook Filed Under: Condiments, Dips, Gluten Free, Party Foods, Side dish, Snacks, Vegetarian, Wheat Free Leave a Comment

IMG_7644

This week I took a foray into baking up pitas.  I have to admit, I knew hummus would come along shortly after.  I mean seriously, how can you eat pitas without it?!  Ha ha.  Well my family gobbled up the first batch of pitas so I’m whipping up another batch.  Click here for that recipe.  Hummus is very easy to make and tastes so much better than store-bought versions.  Plus with this, you control the olive oil (even though it’s a healthy fat I still like to limit the quantity in the food I eat) and I have a little trick on exactly how to do that.

Ingredients:

2 cans of low sodium chick peas (both drained and rinsed)
2 red bell peppers (jarred in water) – reserve the water
4 cloves of garlic (use less if you aren’t a fan)
1 teaspoon of ground cumin
1 teaspoon of chipotle chili powder (or regular chili powder if you have that on hand)
Salt
Pepper
Lemon juice – from half of a lemon
1 tablespoon of olive oil

Directions:

Into your food processor, add the chickpeas, garlic, two roasted red peppers, cumin, chili, salt, pepper and lemon juice.  Puree into well-incorporated.  While the machine is running add the tablespoon of olive oil.  If you need it creamier, most likely you will, add a tiny bit (1/2 teaspoon at a time) of the reserved liquid from the roasted red peppers.  This will not only infuse the hummus with more of the red pepper flavor, it will keep the calories down because you aren’t using more olive oil.  Puree until smooth or desired texture is achieved.  Cover and refrigerate until serving.  Serve with chopped veggies, pita slices etc.  Also works well on a sandwich instead of mayo or mustard.

IMG_7687


— Knead to Cook

Sweet, Spicy and Smoky Dry Rub.

April 22, 2013 by Knead to Cook Filed Under: 4th of July/Patriotic, Beef, Chicken, Gluten Free, Grilling/Rubs/Sauces, Pork, Vitamix, Wheat Free 21 Comments


IMG_7379 IMG_7455 IMG_7405 IMG_7340 IMG_7345

As the the warmer weather of spring arrives across the country, grills will be fired up and beef, chicken and pork will be seared to perfection.  I will not lie, I love spring – not too hot, not to cold and everyone is finally outside enjoying the sunshine on their face.  Our grill has been fired up several times in the past few weeks, moving our kitchen outdoors and I will not complain about that.  Grilled food just tastes better.

Last night my husband grilled the first set of ribs for the season.  I knew, I had to whip up a fresh batch of my sweet, spicy and smoky dry rub in honor of this event.  It is tangy, sweet with a smoky heat.  Perfection!

When using a dry rub of any kind, it’s best that you rub your meat down and refrigerate for at least 12-24 hours.  If you don’t have that kind of time, give it one hour for the spices to work their magic.

Ingredients:

3/4 cup of light brown sugar
2 tablespoons of salt (I used Lo Salt reduced sodium alternative)
1 tablespoon of chipotle chili powder
1 tablespoon of smoked paprika
1 tablespoon of garlic powder
2 teaspoons of ground cumin
1/2 teaspoon of cayenne pepper
1/2 teaspoon thyme
1/2 teaspoon of ground cinnamon

Directions:

Place everything into a mini food processor, Vitamix or you can mix by hand or by adding everything to a tupperware container with a lid.  Process until well-combined.  Store in a container with a lid for up to 6-9 months.

This can be used on chicken, pork or beef.  Rub a generous amount on the meat and refrigerate for best results up to 24 hours or a minimum of 1 hour.  Place the meat on a hot grill and cook until desired temperature is achieved.  Enjoy!

photo


— Knead to Cook

Cauliflower Herb Pizza Crust. Gluten-Free. Vegetarian. Grain-Free.

April 17, 2013 by Knead to Cook Filed Under: Cheese, Gluten Free, Pizza, Vegetarian, Vitamix, Wheat Free 57 Comments

IMG_7134

After numerous attempts, I’m thrilled that today I finally got it!  Any recipe takes time to develop… this one was no exception!  If you follow my simple steps, I promise you will have success too!  This is grain-free, vegetarian and gluten-free.  Packed with flavor and you control the toppings you want on top.  I baked these up earlier in the day (even the day prior) and use them when I need them.

Ingredients:

1 medium-sized head of cauliflower (I used organic), washed and cut into smaller florets (remove the stems)
3 cloves of garlic, minced
1/4 teaspoon of sea salt
1 teaspoon of dried basil
1/2 teaspoon of dried parsley
1/2 teaspoon of crushed red pepper
1/2 cup of part skim mozzarella cheese (grated)
1/4 cup of grated asiago cheese (measure it grated, light and fluffy not packed down)
1 egg
Salt and pepper

Directions:

Preheat your oven to 450 degrees with your pizza stone on the lowest rack setting.

1.  Make sure you’re starting with washed cauliflower that has been dried as much as possible.

2.  Take your florets (with most of the stems removed) and place in your food processor or Vitamix.  Pulse about 8-10 times until it looks like fluffy snow (see pic).  I worked in batches so not to overcrowd.

IMG_7003

3.  Add the cauliflower “snow” to a microwave safe bowl and cover with plastic wrap.  Cook in your microwave for 3 1/2 minutes.  Remove carefully and let it rest, covered for 1 minute.  Remove the plastic wrap and dump the cauliflower into the center of a clean dishtowel.  Let this cool for about 8-10 minutes.

4.  Once cool, place a large bowl underneath and twist up the towel (see pic) and ring it out.  When I say ring, I mean it!  Keep ringing until you literally get no water out of the cauliflower anymore.  See the pic of how much water I got from one medium sized head of cauliflower (over 1 cup)!  Insane!  You need to do this to make the crust perfect… trust me.

IMG_7017


IMG_7020


5.  Open the towel to reveal what looks like sugar cookie dough (best description).  See pic.  Add this to a mixing bowl or stand mixer bowl and add the remaining seasonings/ingredients.  Adjust here what you love or omit what you don’t.  Mix well in your stand mixer or with your hands.  The dough is very easy to work with and will be a bit sticky but not bad.

IMG_7025

6.  I made two 8 inch crusts.  Take a large enough piece of parchment paper and spray it with a non stick oil (I used Smart Balance).  Then split your “dough” in half and form it into an 8 inch round or whatever size you desire.  I used a rubber spatula to press the dough down and tighten up the edges.  It worked perfectly!  (see pic)  You want to make sure that the dough is less than 1/2 an inch thick and even throughout.  I started at the center and worked my way out.  I then made sure the edges had no cracks and were pretty tight.

IMG_7034

7.  With a pizza peel, slide your parchment paper with dough onto your pizza stone in the preheated oven.  Bake for 18-22 minutes or until golden.  This will depend upon your oven.  I like it more golden brown so that’s my recommendation.  Then remove gently and let the crust cool.

IMG_7041


IMG_7054


IMG_7057

8.  I pre-made these for tonight.  When you are ready to cook, make sure your oven has been pre-heated for at least one hour at 450 degrees with the stone inside.  Top your crust with whatever you like and bake until cheese is melted or about 4 minutes.

IMG_7139

601951_10200516919118494_1172264665_n

Enjoy!

— Knead to Cook

Curry Chicken Chobani Salad. Healthy & Low fat.

March 21, 2013 by Knead to Cook Filed Under: Chicken, Gluten Free, Salads, Wheat Free, Yogurt 2 Comments


IMG_5610


My friend Jenny, who we just visited over spring break inspired this recipe.  She had in her fridge a similar salad and I recreated it in her honor.  It is so good that I cannot stop eating it!  Guilt-free because I used organic chicken and non fat Chobani instead of mayo.  Totally healthy!  Chobani adds much needed protein.  It’s a perfect lunch idea!

Ingredients:

1.25 lbs of organic chicken tenders (cooked – I grilled mine)
3 teaspoons of curry powder
1 tablespoon of lime juice (fresh)
2 teaspoon of raw honey (or you can use agave or maple syrup)
1/4 cup of chopped dried cherries (or you can use raisins or fresh grapes halved)
Salt
Pepper
1/2 tsp of ground cayenne pepper (use less if you don’t want it spicy)
3/4 cup of non fat plain Chobani
Green onions, 2 chopped
Optional:  Celery or carrots chopped, red onions, red bell peppers

Directions:

In your stand mixer, with the paddle attachment, place your chicken in the mixing bowl and turn on the mid speed.  This will shred the chicken nicely but keep an eye on it and stop it when you reach the right shredding consistency.  If you prefer, you can chop the chicken into pieces.  Then add the remaining ingredients and mix until combined.  Refrigerate in a covered container.  Great served in a bell pepper, on crackers, bread or pitas.  Enjoy!

— Knead to Cook

Baked Turkey Quinoa Spinach Meatballs.

March 5, 2013 by Knead to Cook Filed Under: Gluten Free, Ground Turkey, Turkey 51 Comments

meatballs

Ahhh my Mondays are normally calm and not packed with appointments, this Monday was quite different.  My day was filled with doctor’s appointments and finally culminated with my youngest daughter’s parent/teacher conference.  I needed something that they would love, total carnivores, but something healthy, that I wouldn’t mind serving.  Filled with quinoa, a nutritional powerhouse – these are totally parent-approved!
These were prepared quickly, freeze perfectly and are the quintessential weeknight meal. You can also add these to your favorite sauce for a great weeknight meal.

Ingredients:

2 lbs of ground turkey (I used lean 93%)
1 cup of cooked quinoa (any color will do)
1 medium yellow onion, diced very small
6 garlic cloves, minced
1 cup of chopped spinach leaves (I used baby spinach leaves)
1/4 teaspoon of red chili flakes
2 tablespoon of low sodium soy sauce, Sriracha sauce or other hot sauce that you love or Worcheshire sauce
1 tablespoon of Italian Seasoning
1 teaspoon of Oregano
Salt and Pepper
1 tablespoon of flaxseed meal
1 egg, beaten

Directions:

Preheat your oven to 350 and spray your baking pan with sides with baking spray.  Set aside.  In your stand mixer with the paddle attached, add all of the ingredients and mix until incorporated.  Then form meatballs, rolling in between your hands and then lay out on your baking sheet.  Repeat until you use all of the meat mixture.  Bake for 35 minutes or a little more – until golden brown.  Rotate them half way through the baking time.

— Knead to Cook

{No cream added} Roasted Tomato Soup.

February 28, 2013 by Knead to Cook Filed Under: Evolution Power Yoga 40 Days, Gluten Free, Soups, Vegetarian, Wheat Free Leave a Comment

soup


I’m on a mission to continue to eat much cleaner and that was revamping my roasted tomato soup (which normally has some cream in it).  This is perfect!  It was thick and creamy sans the extra fat.  I love making this soup in the summer when fresh tomatoes are plentiful but honestly, you can get the worst tomatoes in the winter, like I did, and roast them and you will never know how mealy they were when they started out in your dinner prep.

This recipe has a lot of flexibility so use what you have on hand or what you love!

Ingredients:

3-4 lbs of tomatoes (beefsteak etc.), quartered
2 red bell peppers (whatever color works), sliced into large pieces
1 medium sized onion, sliced into quarters and then peeled apart
10 cloves of garlic, peeled and smashed
Olive oil
Salt
Pepper
1 small 6 ounce can of tomato paste
4 cups  of vegetable or chicken broth
Fresh basil for topping (optional)

Directions:

Preheat your oven to 275 degrees.  Spray a large broiler pan (something with sides) with olive oil.  Then toss all of your tomatoes, peppers, onions and garlic into the pan.  Sprinkle generously with salt and pepper.  Drizzle olive oil and give it a good toss.  Place in the oven for at least 3 hours.  Then remove.

On the stove top over medium heat, place your Dutch oven.  Drizzle some olive oil in the pan and add the tomato paste.  Mix it over the heat until it melts nicely.  Then add the vegetables and stock.  Bring to a boil and then simmer for 30 minutes.  Using a blender or a hand immersion blender, blend until the soup is completely pureed.  Top with fresh basil leaves.  Enjoy!

— Knead to Cook

Gluten-Free Baked Chobani Fonuts {doughnuts}.

February 27, 2013 by Knead to Cook Filed Under: Breakfast, Gluten Free, Snacks, Valentine's Day, Vitamix, Wheat Free, Yogurt 4 Comments

donuts


Fonuts are fake donuts AKA “not fried”, healthy dare I say?  I’m not a huge donut fan but these little guys… I’ve eaten 3 today!  They are minis after-all, so I don’t have the guilt that I normally would have partaking in such a treat.  Gluten-free as well!  I didn’t want to use any “junky” ingredients and guess what – they’re pretty good!!  My kids came home and downed like 8 of them already.

Ingredients:

1 1/3 cup of almond flour (spooned into your measuring cups – not packed down)
1/4 teaspoon baking soda
1/4 teaspoon salt
1 teaspoon ground cinnamon
1/2 teaspoon ground nutmeg (you can also use pumpkin or apple spice seasoning instead)
3 eggs, room temperature
1/4 cup (heaping) of vanilla Chobani yogurt
2 heaping tablespoons of raw honey (use regular if you don’t have it)
Extra honey, cinnamon, sugar for topping which is optional

Directions:

Preheat your oven to 350 degrees and spray your donut pan with baking spray.  Set aside.

You can use a food processor, blender or Vitamix to make the batter creamy and fabulous.  Add all of the dry ingredients and blend (if using a food processor – 4-6 pulses). Then add all of the wet ingredients and blend until smooth.  Stop and scrape down the sides if necessary.  Blend again.  This process took about 1 minute or so.  Then with a spoon, fill each well with about 1/2 or so of batter.  Then bake for 8-10 minutes or until golden.

While baking, I took about two heaping tablespoons of the raw honey (you can also use maple syrup too) and melted it in the microwave until it was watery.  I dipped each donut (fonut) into the liquified honey and then sprinkled some cinnamon and sugar on top.  This is optional.

Enjoy!

IMG_4703

— Knead to Cook

Mango Jalapeño Salsa.

February 26, 2013 by Knead to Cook Filed Under: Appetizers, Chicken, Condiments, Fish, Fruit, Gluten Free, No bake/cooking required!, Party Foods, Pork, Salsas & Guacamole, Side dish, Snacks, Vegetarian, Wheat Free 1 Comment

IMG_4544

*Stamped spoon can be found at:   http://www.etsy.com/people/pumpernickelandwry

Sometimes you need to lighten up a gray day with some tropical salsa.  Today, is a bit gray and going to be rainy… I thought this would be the perfect way to brighten up dinner.  I make this salsa early and let the flavors blend in the fridge until dinner.  Top over grilled chicken, pork or fish.  Or eat it straight up with tortilla chips.  Perfect for a party!

Ingredients:

2 mangoes, peeled, pitted and diced
2 green spring onions, sliced
1/2 red bell pepper, diced
1/2 cup of cilantro leaves, roughly chopped
1 jalapeño, seeds removed (or left in if you like the heat), finely diced
1-2 tablespoons of a better quality balsamic vinegar

Directions:

Add all of the ingredients to a mixing bowl.  Give a good toss and let the flavors develop for at least 2 hours in the refrigerator.  Remove right before serving and add additional balsamic if necessary.

— Knead to Cook

Classic Hummus.

February 22, 2013 by Knead to Cook Filed Under: Appetizers, Condiments, Dips, Evolution Power Yoga 40 Days, Gluten Free, No bake/cooking required!, Snacks, Vitamix, Wheat Free 7 Comments

IMG_4314


If you’ve never made hummus, you don’t know what you’re missing.  Store bought hummus pales in comparison.  This took me about 3 minutes to make.  It tastes unbelievably good and can be used as a dip, sandwich spread… whatever!  So healthy and even the kids love it!  I made it for a party that we’re having tonight to serve with some fresh veggies.  Chips, pretzels, crackers… they all work as a delivery vehicle 🙂

Ingredients:

2 15 ounce cans of low sodium chickpeas (One drained and rinsed, one with liquid)
1/4 cup of toasted sesame seeds
1 tablespoon of olive oil
1/4 cup of lemon juice
1/4 cup of water
4 garlic cloves, smashed (skin removed)
1 heaping teaspoon ground cumin
1/2 teaspoon salt

Directions:

Add everything to your Vitamix or blender.  If you using a Vitamix, set to Puree and let it run.  If using a blender or food processor, blend until smooth and creamy.  Remove and store in a container with a lid.

*Recipe loosely adapted from Vitamix cookbook.

— Knead to Cook

  • « Previous Page
  • 1
  • …
  • 57
  • 58
  • 59
  • 60
  • 61
  • 62
  • Next Page »
twitter  pinterest  instagram  mail  rss
welcome
Get Post via Email

Recent Posts

  • Air Fried Crispy Brussel Sprouts. Vegan and Gluten free.
  • Banana-free protein smoothie. Vegan.
  • Easy overnight oats. Vegan. GF.
  • Lemon garlic no-oil tofu.
  • The easiest triple nut butter. Vegan. GF.

Categories

  • 4th of July/Patriotic
  • 5 favorite things…
  • Air Fried
  • Appetizers
  • Asian inspired
  • Awards.
  • Beans
  • Beef
  • Best Vegan…
  • Beverages
  • Breads
  • Breakfast
  • Brownies
  • Brunch
  • Cabot Fit Team
  • Cakes
  • Candy
  • Cheese
  • Chicken
  • Chili
  • Condiments
  • Cookies
  • Crock Pot
  • Desserts
  • Dips
  • Dressings
  • Easter
  • Egg dishes
  • Evolution Power Yoga 40 Days
  • Featured
  • Fish
  • Fitness.
  • Friday Favorites Series
  • Frozen Pops
  • Fruit
  • Gift ideas
  • Giveaway!!!
  • Gluten Free
  • Going and Living Vegan
  • Grilling
  • Grilling/Rubs/Sauces
  • Ground Turkey
  • Halloween
  • Health & wellness
  • Holiday
  • Holiday Baking Ideas
  • Holiday Gift Guides
  • Homemade Chips
  • Ice cream
  • Indian-inspired.
  • Italian-inspired
  • Knead to Cook Promotions
  • Lentils
  • Life.
  • Lucy Let's Go Post
  • Mexican
  • Muffins
  • My story.
  • No bake/cooking required!
  • Notable mentions.
  • Nuts
  • Pantry
  • Party Foods
  • Pasta
  • Pies
  • Pizza
  • Popcorn
  • Pork
  • Potatoes
  • Pressure Cooker
  • Product Review.
  • Quick Bread
  • Raw
  • Rubs
  • Running/Races
  • Salads
  • Salsas & Guacamole
  • Sauces
  • Seafood
  • Side dish
  • Smoothies
  • Snacks
  • Soups
  • Sponsored
  • St. Patrick's Day
  • Stews
  • Stocks/Broths
  • Thanksgiving
  • Tofu
  • Travel & eating
  • Turkey
  • Valentine's Day
  • Vegan
  • Vegan Burgers
  • Vegan proteins
  • Vegetarian
  • Vinaigrette
  • Vitamix
  • Wheat Free
  • Yogurt
  • Your Life Edit Foundations
  • Zoku Popsicles
my foodgawker gallery
my photos on tastespotting
BEST Food Blogger Recipes
POPSUGAR Select Food POPSUGAR Select PLUS
Foodista Food Blog of the Day Badge
my healthy aperture gallery
My Menu On Honest Cooking
Sorry:

- Instagram feed not found.
iGourmet.com

<a href=”http://www.pntrac.com/t/SEFHRkZMR0xBTURISkdBTUlNREc”><img src=”http://www.pntrac.com/b/SEFHRkZMR0xBTURISkdBTUlNREc” border=”0″ width=”199″ height=”547″ title=”Caudalie Exclusive Premier Cru GWP” alt=”Caudalie Exclusive Premier Cru GWP”></a>

Quick Links

  • Home
  • About me.
  • Recipes
    • Breakfast
    • Brunch
    • Snacks
    • Desserts
    • Vegan
    • Vegetarian
    • Gluten Free
    • Wheat Free
    • Evolution Power Yoga 40 Days
  • In the Media
  • Favorites.
  • Contact.

Archives

  • June 2019
  • May 2019
  • April 2019
  • March 2019
  • February 2019
  • January 2019
  • December 2018
  • November 2018
  • October 2018
  • September 2018
  • August 2018
  • July 2018
  • June 2018
  • May 2018
  • April 2018
  • March 2018
  • February 2018
  • January 2018
  • December 2017
  • November 2017
  • October 2017
  • September 2017
  • August 2017
  • July 2017
  • June 2017
  • May 2017
  • April 2017
  • March 2017
  • February 2017
  • January 2017
  • December 2016
  • November 2016
  • October 2016
  • September 2016
  • August 2016
  • July 2016
  • June 2016
  • May 2016
  • April 2016
  • March 2016
  • February 2016
  • January 2016
  • December 2015
  • November 2015
  • October 2015
  • September 2015
  • August 2015
  • July 2015
  • June 2015
  • May 2015
  • April 2015
  • March 2015
  • February 2015
  • January 2015
  • December 2014
  • November 2014
  • October 2014
  • September 2014
  • August 2014
  • July 2014
  • June 2014
  • May 2014
  • April 2014
  • March 2014
  • February 2014
  • January 2014
  • December 2013
  • November 2013
  • October 2013
  • September 2013
  • August 2013
  • July 2013
  • June 2013
  • May 2013
  • April 2013
  • March 2013
  • February 2013
  • January 2013
  • December 2012
  • November 2012
  • October 2012
  • September 2012
  • August 2012
  • July 2012
  • June 2012
  • May 2012
  • April 2012
  • March 2012
  • February 2012
  • January 2012
  • December 2011

Copyright © 2019 · Swank WordPress Theme By, PDCD