Knead to Cook

Food & fitness obsessed girl.

  • Home
  • About me.
  • Recipes
    • Breakfast
    • Brunch
    • Snacks
    • Desserts
    • Vegan
    • Vegetarian
    • Gluten Free
    • Wheat Free
    • Evolution Power Yoga 40 Days
  • In the Media
  • Favorites.
  • Contact.

Marshmallows.

January 11, 2012 by Knead to Cook Filed Under: Snacks, Valentine's Day Leave a Comment

I’ve posted this recipe once before on my Facebook page a few weeks back. I thought that adding a touch of pink food coloring would be fun to do a practice round of heart-shaped pink fluffy marshmallows.  Then I thought, what would be better…. top dip them in chocolate, cover them in sprinkles and add a stick to make a cute Valentine pop 🙂  These can made w/o the food coloring for your classic white marshmallows.   Cute for Valentine’s Day treats or for a school party.  You can also make them for hot chocolate – dip them in chocolate with crushed peppermint sticks.  The possibilities are endless!

Ingredients:

3 packages unflavored gelatin
1 c of ice cold water, divided
1.5 c of granulated sugar
1 c of light corn syrup
1/4 tsp of salt
1 tsp vanilla extract
Food coloring (a few drops) optional
Optional – 1 vanilla bean, seeded
1/4 c of confectioners’ sugar
1/4 c of cornstarch
Non stick spray – for the pan


    • Directions:
      Place the gelatin into the bowl of a stand mixer along with 1/2 cup of the water. Have the whisk attachment standing by.

      In a small saucepan combine the remaining 1/2 cup water, granulated sugar, corn syrup and salt. Cook over medium flame, cover and cook for for 3 to 4 minutes. Uncover, clip a candy thermometer onto the side of the pan and continue to cook until the mixture reaches 240 degrees F, approximately 7 to 8 minutes. Once the mixture reaches this temperature, immediately remove from the heat.

      Turn the mixer on low speed and slowly pour the sugar mixture down the side of the bowl into the gelatin mixture. Once everything is added, turn it up to high speed. Whip for 14 minutes. Add the vanilla extract and seeds (if using) & food coloring (if using) during the last minute of whipping. While the mixture is whipping~ prepare the pans as follows.

      Combine the confectioners’ sugar and cornstarch in a small bowl. Lightly spray a 13 by 9-inch metal baking pan with nonstick cooking spray. Dust the prepared pan with the sugar/starch mixture. Make sure it is completely covered. Return the remaining mixture to the bowl for later use.

      After mixing, pour the mixture into the prepared pan, using a lightly oiled spatula for spreading evenly into the pan. Be sure to make top even as the marshmallow will set as you leave it. Dust the top with enough of the remaining sugar and cornstarch mixture to lightly cover. Reserve the remaining for later. Allow the marshmallow pan to sit for 4-8 hours.

      Turn the marshmallows out onto a cutting board and cut into 1-inch squares using a dough cutter or a pizza wheel dusted with the confectioners’ sugar mixture. Once cut, dust each side with the sugar/starch mixture. Store in tupperware for up to 2-3 weeks.


— Knead to Cook

Zucchini Banana Chobani Muffins.

January 11, 2012 by Knead to Cook Filed Under: Muffins, Quick Bread, Snacks, Vegetarian 6 Comments

I love creating new muffin recipes!  I love it even more when I can pack veggies in them and my kids gobble them up 🙂  That’s the case with these muffins.  They are not overly sweet, just the right amount, and very tender -thanks to the Chobani yogurt addition.  Okay that’s my intro to this recipe. I hope you enjoy these as much as we do!


Ingredients:

4 eggs, at room temperature
1 c of granulated sugar
3/4 c of Chobani plain non fat yogurt
2 ripe bananas
2 c of all purpose flour, unbleached
1 c of whole wheat flour
1.5 tsp of baking powder
1.5 tsp of baking soda
2 tsp of ground cinnamon
1 tsp of salt
1 medium zucchini, shredded
1/2 c of chopped walnuts
1/2 c of chocolate chips (optional)

Directions:
In your mixing bowl with the paddle attachment, blend eggs, sugar and yogurt.  Add bananas and mix well.  In a separate bowl, combine flours, baking powder, baking soda, cinnamon & salt.  Add to the wet mixture and blend.  Stir in the zucchini and nuts until combined.

Pour this into either non stick sprayed muffins pans or into cupcake liners.  Baked at 350 degrees for 20 minutes or until a toothpick inserted comes out clean.  Cool on wire racks and then store.

Yum.


— Knead to Cook

Vegetarian Spicy Red Quinoa Stuffed Peppers.

January 10, 2012 by Knead to Cook Filed Under: Vegetarian 1 Comment

Meatless Monday!  Every Monday, I try to serve my family a completely vegetarian dinner.  This was a huge hit, even with my kids!  The spice combination really kicked up the flavor. Super easy, can definitely prepare in advance and just pop in the oven to reheat.  Enjoy!

Ingredients:

1 -14 oz can of Vegetable Broth (I used organic Pacific brand)
1/4 c of water
2 bay leaves
1 c of red quinoa, completely rinsed
5 peppers, cut in half, remove seeds/membrane
4 carrots, chopped into smaller pieces
1/2 of a medium sized yellow onion, diced
1 clove of garlic, chopped
Olive oil for drizzling in the pan
2 tbl of slivered almonds, pine nuts, sunflower seeds or whatever smaller nut you prefer.
1 tsp of oregano
1 tsp of smoked paprika
1/2 tsp Italian seasonings
1/8 tsp cayenne
Salt and pepper to taste

Directions:

Fill a large Dutch oven with water (and a few pinches of salt).  Bring to a boil.  Add the halved peppers for 5 minutes.  Remove and drain.   Set aside.

In a small saucepan, heat the broth, water and bay leaves.  Once boiling, add the rinsed quinoa.  Turn the temperature down to a simmer (low) and cover.  Cook for about 20 minutes or until all of the liquid has been absorbed.   Turn off and remove from heat.  Remove the bay leaves.

In a saute pan, drizzle olive oil and cook the onion and carrot for about 10 minutes.  Add the garlic for the last 30 seconds.  Stirring constantly.  Add the quinoa, and all of the spices and the nut of choice.  Stir and mix until completely incorporated.  Remove from heat and set aside.

Assembly:

Spray your 13×9 pan with Pam or any other nonstick spray.  Lay each pepper half, cut side up, neatly without overcrowding.  Spoon the quinoa mixture into each pepper.  If you going to bake immediately – set the oven temp for 350 degree.  Bake for 30-35 minutes.  If you have prepared this dish to bake later – wrap in plastic wrap and refrigerate.  Bake following the same directions.

I hope you enjoy this dish as much as we have 🙂

— Knead to Cook

Baked Pumpkin Oatmeal.

January 9, 2012 by Knead to Cook Filed Under: Breakfast, Vegetarian 8 Comments

We just got home from our run and I wanted to whip up something warm to eat.  This was a super quick recipe and bakes up in about 30 minutes.  This is definitely one way to get your week started off on the right foot!

Ingredients:

2 c of quick cooking oats
1/4 c of brown sugar
1 tsp of cinnamon
1/4 tsp of pumpkin pie spice
2 tbl of slivered almonds (any nut would work)
1 tsp of baking powder
1 tsp of vanilla extract
1.5 c of almond milk (vanilla)
1/2 c of pumpkin puree
1 egg, beaten
Cooking spray

Preheat oven to 375 degree.  Spray a 9×9 pan with non-stick spray and set aside.

In one bowl, combine all of your dry ingredients (oats through baking powder).  In your mixing bowl, add vanilla, milk, pumpkin @ egg.  Once mixed, incorporate your dry ingredients and mix until combined.  Pour into your prepared pan and bake for 30 minutes.  It should be spongy to the touch but set in appearance.  Serve in individual bowls or ramekins.  Enjoy!

— Knead to Cook

And the winner is…

January 9, 2012 by Knead to Cook Filed Under: Giveaway!!! Leave a Comment

Okay a winner has been chosen & that lucky person is….

Debra Holt Gabriel 🙂

Please email me at robin@kneadtocook.com with your mailing address.

Okay guys don’t be sad that you didn’t win.  I have many more giveaways planned for the next several weeks/months.  I also want to link you up to my friend’s eBay auction page where she sells these awesome liners.

http://www.ebay.com/sch/slinky1128/m.html?_nkw=&_armrs=1&_from=&_ipg=50&_sop=1

— Knead to Cook

Turkey chili.

January 9, 2012 by Knead to Cook Filed Under: Chili, Ground Turkey 4 Comments

I love chili.  In fact my entire family does.  It is the quintessential food for cold days, football viewing days & rainy days – whenever.  I lighten this recipe up by using lean organic ground turkey & by using a lot of spices to pump up the flavor.  I hope you give this one a try!

Ingredients:

2 tsp of olive oil
1 lb lean ground turkey (not the dark meat)
1 medium onion, chopped
1 bell pepper, chopped
4 cloves of garlic, chopped
2 – 15 oz cans of dark red beans
1 – 28 oz can of chopped tomatoes.  I like Furmano’s with onions and peppers for this recipe.
1 – 6 oz can of tomato paste
1/4 c of water
1 tsp of chili powder
2 tbl of ground cumin
2 tsp of cayenne pepper
Salt and pepper to taste
Optional:  I throw in one jalapeño chopped with seeds.

Toppings:
Low fat cheddar cheese
1 red onion, diced
1 jalapeño, chopped

Directions:
In a large Dutch oven, heat the olive oil.  Once hot, add the onions, peppers and ground turkey.  Cook until no longer pink.  Add the garlic & the remaining ingredients.  Bring to a boil.  Turn down, cover and let simmer for 1-6 hours.  Stirring, of course, occasionally.  Top with cheddar, onions or jalapeños.  Enjoy!

The spoon was made for me by Carrie.  Here is the link to her Etsy page 🙂

http://www.etsy.com/people/pumpernickelandwry


— Knead to Cook

Double Baked Plum Chicken.

January 8, 2012 by Knead to Cook Filed Under: Chicken Leave a Comment

This recipe is from Cooking Light, January, 2012 issue. We hosted a dinner party with friends that eat a strict Paleo diet.  This menu choice fit the bill along with a spinach salad with Asian pears & chopped walnuts.  And for dessert, a fresh fruit and berry salad with fresh lemon zest & juice.

My husband cooked this part of the meal tonight.  The only modification he made to the original recipe is that we baked it in the oven for 20-25 minutes not 6 minutes, as the original recipe called for.

Ingredients:

  • 1 tablespoon olive oil, divided
  • 1/3 cup sliced shallots
  • 2 teaspoons minced peeled fresh ginger
  • 1/2 cup plum wine
  • 3/4 cup fat-free, lower-sodium chicken broth
  • 1 teaspoon chile sauce
  • 1 teaspoon Chinese mustard
  • 1/2 cup halved dried plums (about 9)
  • 4 (6-ounce) skinless, boneless chicken breast halves
  • 1/4 teaspoon salt
  • 1/4 teaspoon freshly ground black pepper
  • 1/4 cup (1/2-inch) slices green onions
  1. Preheat oven to 425°.
  2. Heat a medium saucepan over medium-high heat. Add 1 teaspoon oil to pan; swirl. Add shallots and ginger; sauté 1 minute. Add wine; bring to a boil. Cook 1 minute. Add broth, chili sauce, and mustard; bring to a boil. Cook until reduced to 3/4 cup (about 8 minutes). Stir in plums. Remove from heat.
  3. Heat remaining 2 teaspoons oil in a large ovenproof skillet over medium-high heat; swirl. Sprinkle chicken with salt and pepper. Add chicken to pan, and sauté for 3 minutes. Turn chicken over; pour plum mixture over chicken. Bake at 425° for 20-30 minutes or until done. Let chicken stand 5 minutes. Sprinkle with green onions.

— Knead to Cook

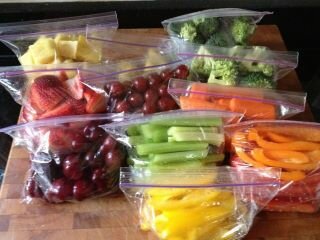
Snack attack plan!

January 7, 2012 by Knead to Cook Filed Under: Fruit, Snacks, Vegetarian Leave a Comment

I promise, with a little bit of time, you will be ready any time you are craving a snack!  You plan & organize your life… why not your snack?  You will be more likely to eat healthy if you surround yourself with good food.  Happy 2012!!!  You deserve it!

— Knead to Cook

Giveaway time!

January 7, 2012 by Knead to Cook Filed Under: Giveaway!!! 40 Comments


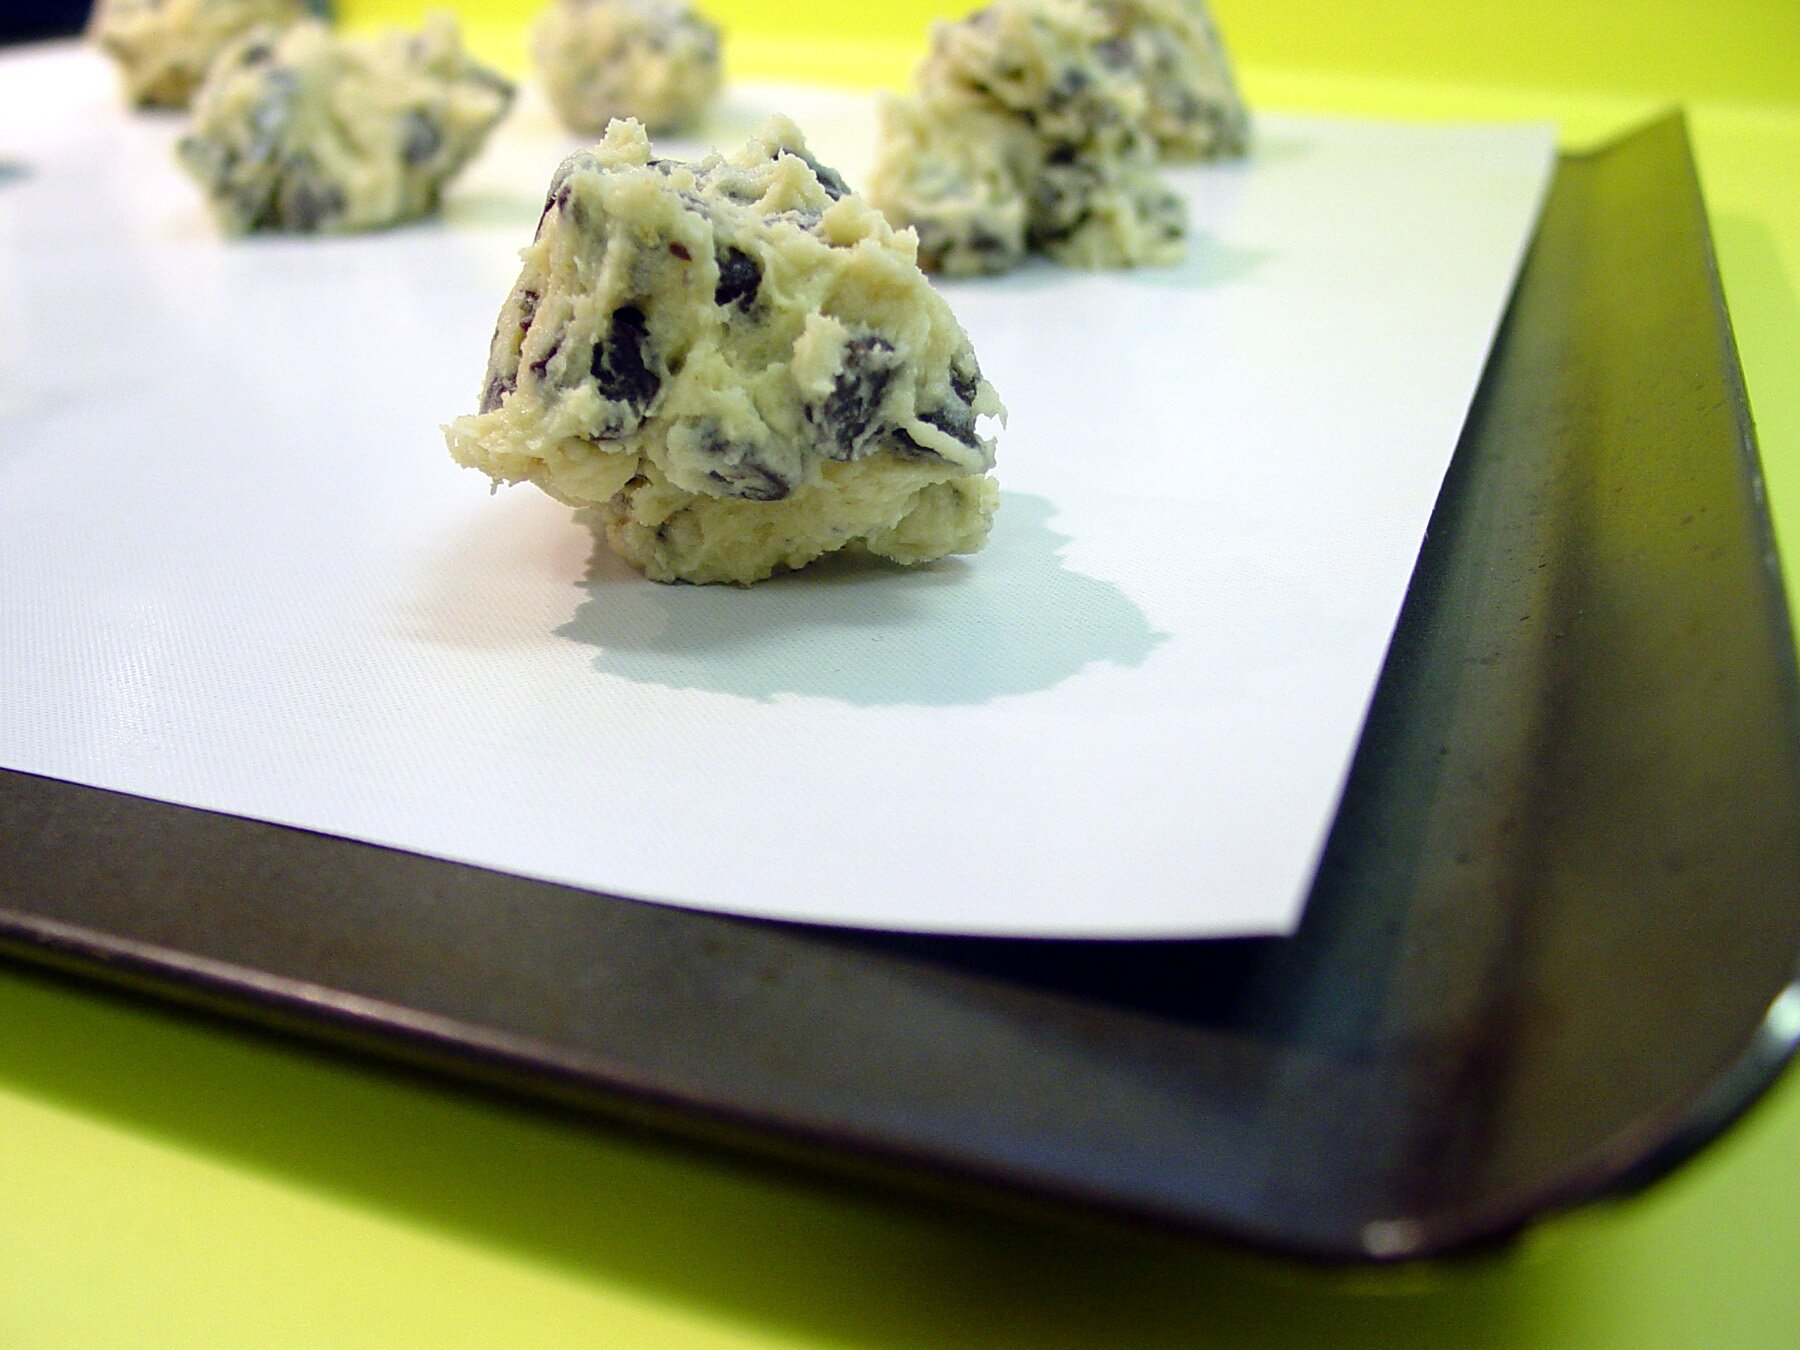
Because I’m so happy that I reached 1,300 friends on my Facebook page, I thought it would be fun to do a giveaway.  This giveaway is from one of my dearest friends in the world.  Her husband manufacturers the American version of the Silpat liner for baking.  It isn’t sold to the general public and is only available to commercial businesses.  She is giving me 3 Shape2Bake 12×16 inch baking liners.  The best thing about these – you can cut them to fit whatever pan you like or use as they come for baking on your cookie sheets.

Here is the product information:

Finally, we found an American improvement to the French Silpat! Unlike the thick silicone Silpats, Shape2BAKE is made in the USA from a super durable TEFLON® polymer – for the ultimate in non-stick and long life. Unlike Silpats, Shape2BAKE can be used on both sides for longer life and functionality. Unlike Silpats, Shape2BAKE doesn’t insulate the oven’s heat leaving uncooked product, overcooked top/edges and unbrowned bottoms. Shape2BAKE is even thin enough that it can be cut to any size or shape with scissors to custom fit your cookware (I have eliminated soaking and scrubbing by using these cut-to-fit sheets to line cake pans, round pie tins, lasagna pans, roasting pans, cookie sheets, mini toaster liners, microwave deck liners, skillets, egg pans…everything in my kitchen). Try doing that with a Silpat! They can even be used as an oven deck liner to eliminate the clean up of spills and carbonized debris on the oven floor.

Cook healthy and save time and money by eliminating parchment paper, grease, fats or oils when you bake, roast, cook or fry. Use Shape2BAKE when working with sticky materials such as batter, taffy, caramel, pralines, or anything your imagination allows. Go ahead and add all the sugar you like — it won’t stick — and Shape2BAKE will save you a mess! Shape2BAKE pan liners are thin and easy to store either flat or rolled up.

Make sure your a fan of Knead to Cook’s Facebook page by Sunday @ 6:30 p.m.  Random.org will randomly select a winner and they will be announced on Sunday night, 1/8/12 @ 8 p.m.   Happy Baking!  ~Robin


— Knead to Cook

Orange cheesecake with gingersnap crust.

January 6, 2012 by Knead to Cook Filed Under: Desserts 4 Comments

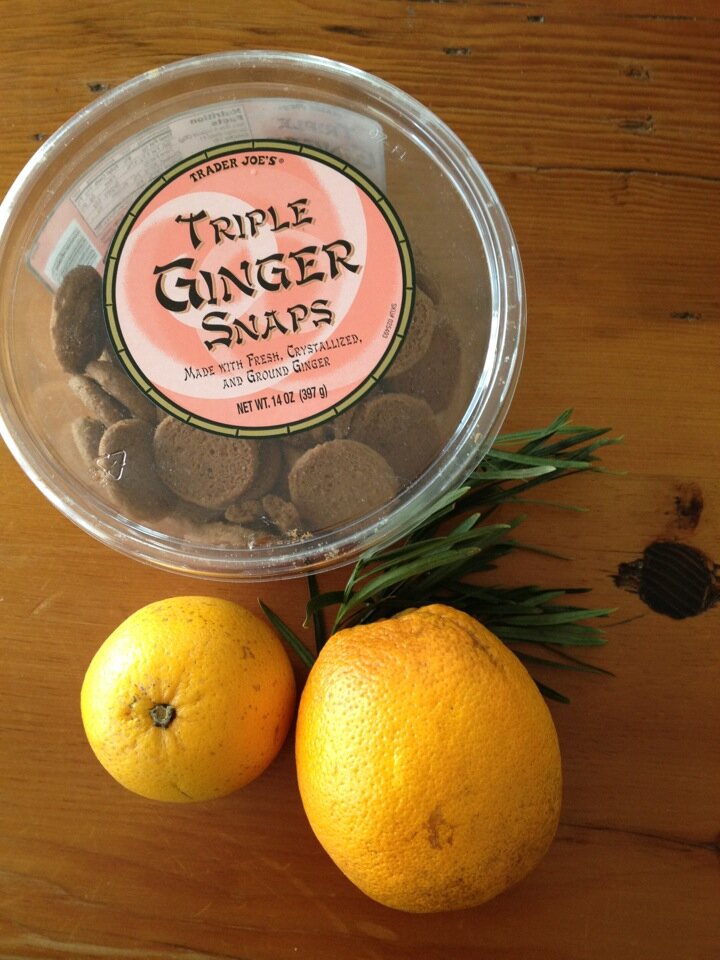
There are certain members of my family that ❥ cheesecake.  I thought it would be fun to create a recipe that combined her favor flavors & would allow me to use up some oranges from Florida that I received as a gift & some gingersnap cookies leftover from the holidays. Win-Win, right?  I was hopeful and enthusiastic!

The end result was fabulous!  I have to admit, the flavor combination was right on.  I did sneak a taste when cutting it.  😉  I hope you enjoy this recipe as much as my family will tonight.

Recipe…

Preheat the oven to 325 degree.
Crust:
40 gingersnap cookies (small one bite sized cookies)
1 tsp of sugar
1/4 c of melted I can’t believe it’s not butter or butter

In your food processor, add all of the ingredients for the crust and pulse about 12 times.   Pour the crumb mixture on top of the parchment paper that is lining your glass 9×9 pan.  Push it down with a large spoon so it is evenly distributed and smooth.  Bake for 12 minutes.  Remove and let cool.

Next step:
I took my 9×9 glass baking square and coated it with butter.  I then cut a piece of parchment paper and placed that over the glass pan.  I pushed it down to fit inside, going up the sides as well.  See photo.


Cheesecake Filling:

2 -8 oz blocks of low fat cream cheese, at room temperature
Zest of 2 oranges
Juice from 1/2 an orange
2 eggs, room temperature
1/2 c of granulated sugar

Add to your food processor and blend for about 1 minute.  Pour this mixture on top of the cooled crust.  I then took my 13×9 pan and filled it 1/3 filled with tap water, to make a water bath.  I then place my 9×9 into the water bath.  This will help the cheesecake cook slowly and it will help it not to crack.  See photo above for a reference.

Bake this for 40-45 minutes.  When you remove it, it should be slightly jiggly but not watery.  Remove the 9×9 pan and place on a cooling rack for 40 minutes.  After the 40 minutes, place in the refrigerator for 4 hours to overnight.

To remove, gently pull up on the parchment paper and lay on a flat surface.  Slice with a large, sharp knife.  Enjoy!

I need to give a shout out to the amazing artisan that made the spoon for me…
http://www.etsy.com/people/pumpernickelandwry
Carrie is a remarkably talented woman!!!


— Knead to Cook

  • « Previous Page
  • 1
  • …
  • 125
  • 126
  • 127
  • 128
  • 129
  • 130
  • Next Page »
twitter  pinterest  instagram  mail  rss
welcome
Get Post via Email

my foodgawker gallery

Recent Posts

  • Chocolate chip cookie baked oatmeal.
  • The easiest chia jam
  • The easiest & best tofu ever.
  • Tofu “beef”. Vegan and Gluten Free.
  • Veggie stir fry with peanut sauce.

Categories

  • 4th of July/Patriotic
  • 5 favorite things…
  • Air Fried
  • Appetizers
  • Asian inspired
  • Awards.
  • Beans
  • Beef
  • Best Vegan…
  • Beverages
  • Breads
  • Breakfast
  • Brownies
  • Brunch
  • Cabot Fit Team
  • Cakes
  • Candy
  • Cheese
  • Chicken
  • Chili
  • Cocktails
  • Condiments
  • Cookies
  • Crock Pot
  • Desserts
  • Dips
  • Dressings
  • Easter
  • Egg dishes
  • Evolution Power Yoga 40 Days
  • Featured
  • Fish
  • Fitness.
  • Friday Favorites Series
  • Frozen Pops
  • Fruit
  • Gift ideas
  • Giveaway!!!
  • Gluten Free
  • Going and Living Vegan
  • Grilling
  • Grilling/Rubs/Sauces
  • Ground Turkey
  • Halloween
  • Health & wellness
  • Holiday
  • Holiday Baking Ideas
  • Holiday Gift Guides
  • Homemade Chips
  • Ice cream
  • Indian-inspired.
  • Italian-inspired
  • Knead to Cook Promotions
  • Lentils
  • Life.
  • Lucy Let's Go Post
  • Mexican
  • Muffins
  • My story.
  • No bake/cooking required!
  • Notable mentions.
  • Nuts
  • Pantry
  • Party Foods
  • Pasta
  • Pies
  • Pizza
  • Popcorn
  • Pork
  • Potatoes
  • Pressure Cooker
  • Product Review.
  • Quick Bread
  • Raw
  • Rubs
  • Running/Races
  • Salads
  • Salsas & Guacamole
  • Sauces
  • Seafood
  • Side dish
  • Smoothies
  • Snacks
  • Soups
  • Sponsored
  • St. Patrick's Day
  • Stews
  • Stocks/Broths
  • Thanksgiving
  • Tofu
  • Travel & eating
  • Turkey
  • Valentine's Day
  • Vegan
  • Vegan Burgers
  • Vegan proteins
  • Vegetarian
  • Vinaigrette
  • Vitamix
  • Wheat Free
  • Yogurt
  • Your Life Edit Foundations
  • Zoku Popsicles
my foodgawker gallery
my photos on tastespotting
BEST Food Blogger Recipes
POPSUGAR Select Food POPSUGAR Select PLUS
Foodista Food Blog of the Day Badge
my healthy aperture gallery
My Menu On Honest Cooking
Sorry:

- Instagram feed not found.
iGourmet.com

<a href=”http://www.pntrac.com/t/SEFHRkZMR0xBTURISkdBTUlNREc”><img src=”http://www.pntrac.com/b/SEFHRkZMR0xBTURISkdBTUlNREc” border=”0″ width=”199″ height=”547″ title=”Caudalie Exclusive Premier Cru GWP” alt=”Caudalie Exclusive Premier Cru GWP”></a>

Quick Links

  • Home
  • About me.
  • Recipes
    • Breakfast
    • Brunch
    • Snacks
    • Desserts
    • Vegan
    • Vegetarian
    • Gluten Free
    • Wheat Free
    • Evolution Power Yoga 40 Days
  • In the Media
  • Favorites.
  • Contact.

Archives

  • March 2021
  • February 2021
  • January 2021
  • November 2020
  • October 2020
  • September 2020
  • August 2020
  • July 2020
  • June 2020
  • May 2020
  • April 2020
  • March 2020
  • February 2020
  • January 2020
  • December 2019
  • November 2019
  • October 2019
  • September 2019
  • August 2019
  • July 2019
  • June 2019
  • May 2019
  • April 2019
  • March 2019
  • February 2019
  • January 2019
  • December 2018
  • November 2018
  • October 2018
  • September 2018
  • August 2018
  • July 2018
  • June 2018
  • May 2018
  • April 2018
  • March 2018
  • February 2018
  • January 2018
  • December 2017
  • November 2017
  • October 2017
  • September 2017
  • August 2017
  • July 2017
  • June 2017
  • May 2017
  • April 2017
  • March 2017
  • February 2017
  • January 2017
  • December 2016
  • November 2016
  • October 2016
  • September 2016
  • August 2016
  • July 2016
  • June 2016
  • May 2016
  • April 2016
  • March 2016
  • February 2016
  • January 2016
  • December 2015
  • November 2015
  • October 2015
  • September 2015
  • August 2015
  • July 2015
  • June 2015
  • May 2015
  • April 2015
  • March 2015
  • February 2015
  • January 2015
  • December 2014
  • November 2014
  • October 2014
  • September 2014
  • August 2014
  • July 2014
  • June 2014
  • May 2014
  • April 2014
  • March 2014
  • February 2014
  • January 2014
  • December 2013
  • November 2013
  • October 2013
  • September 2013
  • August 2013
  • July 2013
  • June 2013
  • May 2013
  • April 2013
  • March 2013
  • February 2013
  • January 2013
  • December 2012
  • November 2012
  • October 2012
  • September 2012
  • August 2012
  • July 2012
  • June 2012
  • May 2012
  • April 2012
  • March 2012
  • February 2012
  • January 2012
  • December 2011

Copyright © 2021 · Swank WordPress Theme By, PDCD