
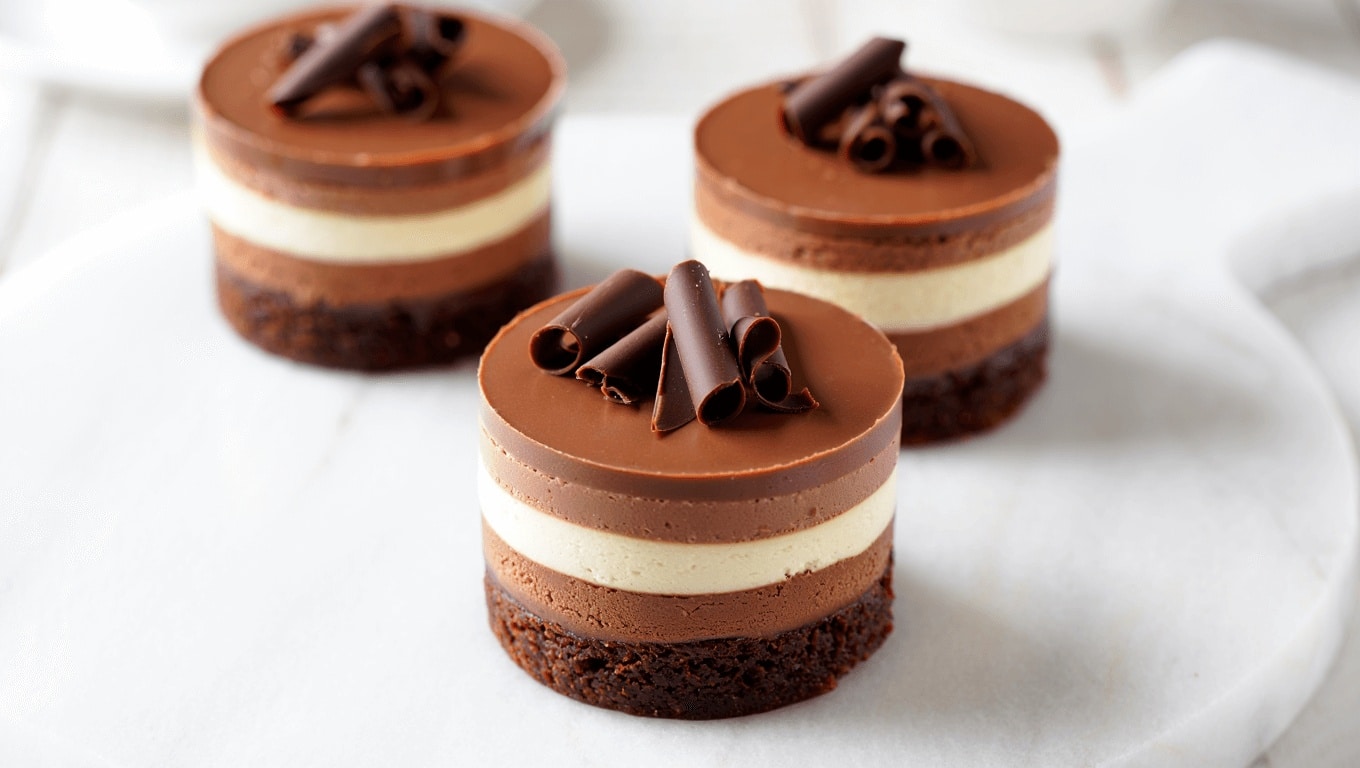
These mini triple chocolate mousse cakes pack six layers of chocolate into a single bite. A fudgy brownie base supports three mousses — dark, milk and white — finished with a silky milk chocolate ganache and delicate chocolate curls. If you love layered desserts and dramatic presentation, this recipe delivers both show and flavor.
Quick facts, timing and kitchen notes for mini mousse cakes
- Servings: makes about six 2½–3 inch mini cakes.
- Prep time: ~30 minutes active work.
- Cook time: ~20 minutes for the brownie.
- Total time: Plan for refrigeration and chilling: expect 4–6 hours or overnight.
- Category: Dessert | Method: Oven for brownie; refrigeration for mousse set.
- Tip: If you don’t own metal mousse rings, paper collars work in a pinch.
Ingredients you’ll need to build each chocolate layer
The components are simple quality ingredients. Measure carefully for consistent texture.
Brownie base (one 7×11 pan, cut into rounds)
- 1/2 cup unsalted butter
- 7 oz good semi‑sweet chocolate, chopped
- 3/4 cup granulated sugar
- 2 large eggs
- 1 teaspoon vanilla extract
- 1/2 cup + 2 tbsp all‑purpose flour
- 2 tbsp unsweetened cocoa powder
- 1/4 teaspoon salt
Three chocolate mousses (dark, milk, white)
- 1 2/3 cups chilled heavy whipping cream, divided into three equal portions
- 5.5 oz dark chocolate, finely chopped
- 5.5 oz milk chocolate, finely chopped
- 5.5 oz white chocolate, finely chopped
- 3 x 3/4 tsp unflavored gelatin powder
- 3 x 1 tbsp cool water (for blooming gelatin)
- 3 x 1/4 cup heavy cream (warmed and poured over each chocolate)
Ganache and garnish
- 4 oz milk chocolate, chopped
- 1/4 cup heavy cream
- Block of semi‑sweet chocolate for shaving curls
How to bake a fudgy brownie base
- Preheat the oven to 350°F (175°C). Line a 7×11 pan with foil or parchment with an overhang.
- Melt the chopped semi‑sweet chocolate and butter together over low heat. Stir until smooth, then remove from heat.
- Whisk in the sugar. Allow the mixture to cool slightly before adding the eggs and vanilla.
- Fold in the flour, cocoa and salt until just combined. The batter will be thick.
- Spread the batter evenly in the prepared pan and bake 20–25 minutes. A toothpick should come out mostly clean.
- Cool on a rack for about an hour. Cover and refrigerate at least 2–3 hours to make cutting easier.
- Use a 2½–3 inch round cutter to stamp out six brownie disks. Place each disk on parchment for assembly.
Three mousses: technique and assembly for silky layers
All three mousses use the same method. Key points: avoid overheating chocolate, keep whipped cream cold, and bloom gelatin correctly.
- Whip 1 2/3 cups heavy cream to soft peaks. Divide into three equal portions and chill.
- For each chocolate type, heat 1/4 cup heavy cream until it just simmers.
- Pour the hot cream over the chopped chocolate in a heatproof bowl. Let rest 1–2 minutes, then stir until smooth.
- Bloom 3/4 tsp gelatin in 1 tbsp cool water. Warm gently until dissolved and add to the melted chocolate.
- Fold roughly half a portion of whipped cream into the chocolate to loosen it, then gently fold in the rest until smooth and even.
- Repeat this process for dark, then milk, then white chocolate. For white chocolate, ensure it cools and thickens slightly before folding in cream to prevent separation.
Practical tips for temperature and texture
- Chocolate temp: Aim for about 80°F before adding whipped cream. Too hot and the cream will melt.
- Whipped cream: Stop at soft peaks for the lightest, most stable mousse.
- Gelatin: Always bloom gelatin in cold water first, then warm gently to dissolve fully.
How to assemble and set the mini cakes like a pro
- Create collars: cut strips of baking paper about 4 x 10 inches and wrap them around each brownie disk. Secure with tape. Metal rings work better if you have them.
- Pipe or spoon the dark chocolate mousse onto each brownie to form the first layer. Smooth or level with a small spatula.
- Chill briefly so the first layer firms enough to support the next mousse.
- Repeat with the milk chocolate mousse. Chill again to help layers remain distinct.
- Finish by adding the white chocolate mousse. Transfer the tray to the refrigerator and chill 4–5 hours, or overnight, until fully set.
- Remove the paper collars once the mousse is firm and the cakes hold their shape.
Make the ganache and add finishing decorations
- Warm 1/4 cup heavy cream and pour it over 4 oz chopped milk chocolate. Stir until smooth and glossy.
- Let the ganache cool to a thicker, pourable consistency before spooning or pouring it over each chilled mini cake.
- Use a vegetable peeler on a block of semi‑sweet chocolate to create curls. Garnish each cake while the ganache is still tacky.
- Keep finished cakes refrigerated until serving. They hold best when served cold.
Troubleshooting and helpful shortcuts
- If your chocolate seizes, add a small spoonful of warm cream and stir gently.
- Working on a hot day? Chill bowls and utensils beforehand. Chocolate melts fast in warm kitchens.
- No mousse rings? Use firm paper collars taped into place. Press gently when piping to avoid tearing the paper.
- For faster service, set minis overnight in the fridge for the cleanest slices and easiest handling.
Similar Posts:
- Triple chocolate mousse cake: decadent, easy recipe to wow guests
- Strawberry chocolate cake: irresistible recipe anyone can bake in 30 minutes
- Underrated bakery cake: unbelievably delicious and shockingly easy to make
- Peanut butter chocolate cake: fudgy, irresistible recipe to bake tonight
- Cookie dough brownies: fudgy, raw-centered bars you won’t be able to resist

Health advocate and wellness researcher, Dr. Monroe brings clarity to confusing health trends with science-backed advice. Her mission is to help readers live vibrantly, from the inside out.