
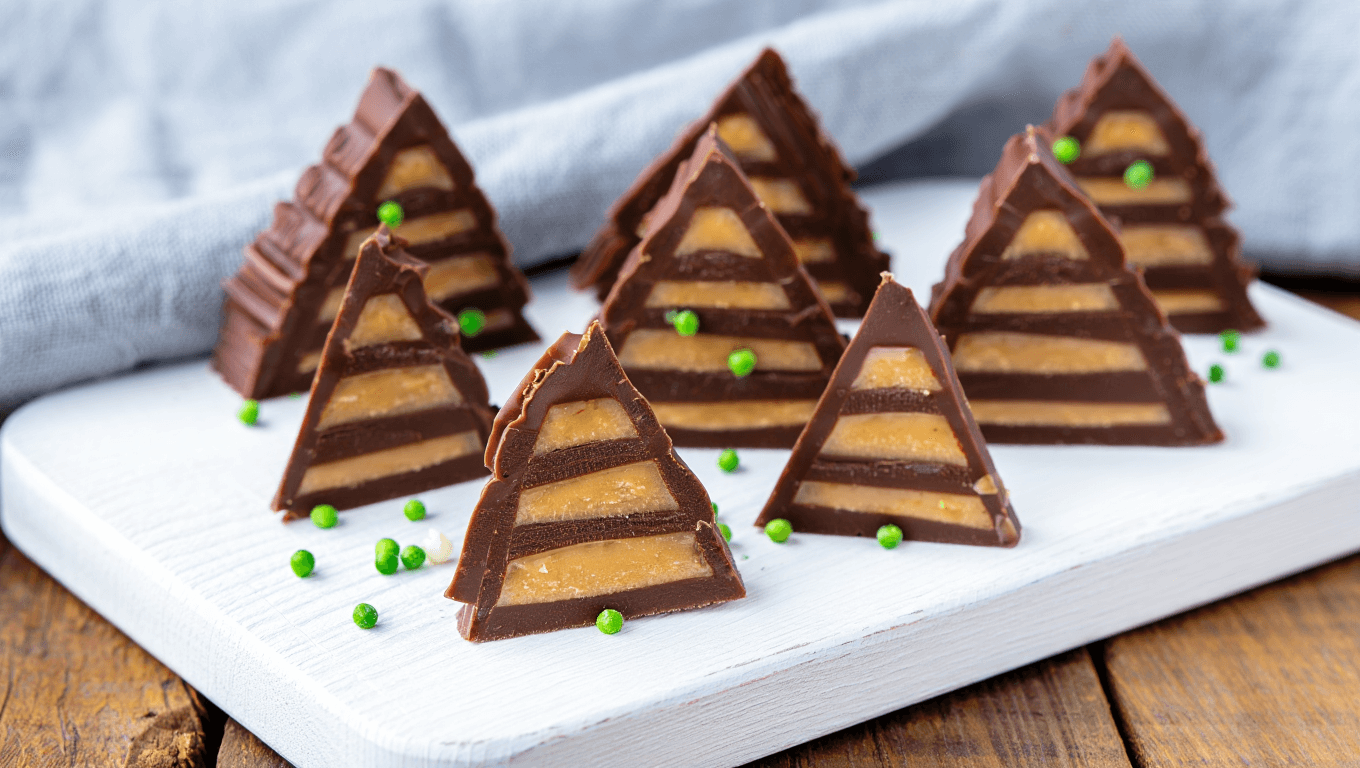
Turn classic peanut butter cups into a whimsical holiday treat with these Chocolate Peanut Butter Christmas Trees. Crisp chocolate shells, a creamy peanut butter center and a festive tree shape make them perfect for cookie trays and gift boxes. They’re simple to prepare, freezer-friendly, and irresistibly close to the flavors of a Reese’s cup.
Why this Reese’s-style holiday candy works
These no-bake trees capture the familiar combo of chocolate and peanut butter in a seasonal form. The recipe uses pantry staples and minimal steps, so you can batch-make them for parties. They freeze well, which frees up time closer to the holidays.
Quick facts
- Prep time: about 30 minutes
- Chill/freeze time: about 60–120 minutes total
- Total time: roughly 3 hours including chilling
- Yield: about 18 trees, depending on cutter size
- Method: No-bake
Ingredients for Chocolate Peanut Butter Christmas Trees
- 1 cup creamy peanut butter
- ¼ cup unsalted butter, melted
- 2 tablespoons brown sugar
- 2 teaspoons vanilla extract
- ¼ teaspoon salt
- 2 cups powdered sugar, sifted
- 10–12 oz chocolate — mix semi-sweet and milk if you like
Step-by-step: Make the no-bake trees
- Line an 8×8 inch pan with parchment, leaving an overhang for easy removal.
- In a bowl, combine peanut butter, melted butter, brown sugar, vanilla and salt. Stir until smooth.
- Gradually add powdered sugar and mix until the mixture is firm enough to press.
- Press the peanut butter mixture into the prepared pan to form a layer about ½ inch thick.
- Freeze the pan until the layer is solid enough to cut cleanly, about 30–45 minutes.
- Lift the slab from the pan and place it on a parchment-lined tray.
- Use a small Christmas tree cookie cutter to stamp trees from the slab. Return the cut shapes to the freezer for 45–60 minutes.
- Melt the chocolate using a double boiler or microwave in short bursts, stirring between intervals, until smooth.
- Working with a few frozen trees at a time, dip each piece into melted chocolate. Use a fork to lift and tap off excess chocolate.
- Set the coated trees on parchment and chill until the chocolate firms. Store in the fridge or freeze for longer keeping.
Practical tips for perfect results
- Work cold: The peanut butter centers soften quickly at room temperature. Keep extras in the freezer while you coat a few at a time.
- Don’t waste scraps — press leftovers together, chill, and cut extra trees.
- If chocolate thickens, gently reheat. Avoid overheating or you’ll lose shine.
- For easier dipping, use a fork and a second fork to transfer pieces to the tray.
- Adjust sizes: smaller cutters yield more pieces; larger cutters reduce the count.
Storage, make-ahead suggestions and serving ideas
- Make ahead: Freeze finished trees in a single layer, then layer with parchment in an airtight container.
- Keep chilled until serving. Thaw briefly at room temperature for a softer bite.
- Package in cellophane bags with ribbon for gifts or holiday favors.
- Serve alongside hot cocoa, coffee, or on a dessert board with cookies and candies.
Ways to customize and flavor variations
- Swap creamy for crunchy peanut butter for texture contrast.
- Stir in a tablespoon of cocoa powder for a chocolate peanut butter center.
- Top with sprinkles or small candy stars before the chocolate sets for a festive finish.
- Try a white chocolate coating for a snowy look, or drizzle contrasting chocolate for decoration.
- Add a pinch of cinnamon or a drop of almond extract for subtle seasonal notes.
Similar Posts:
- Chocolate peanut butter eggs: irresistible homemade treat
- Chocolate peanut butter oatmeal bars: easy no-bake recipe for chewy snacks
- Peanut butter granola cups: no-bake, ready in 10 minutes
- White chocolate Easter bunnies: easy no-fail recipe for irresistible treats
- Chocolate peanut butter lasagna: decadent no-bake dessert you’ll crave

Health advocate and wellness researcher, Dr. Monroe brings clarity to confusing health trends with science-backed advice. Her mission is to help readers live vibrantly, from the inside out.