
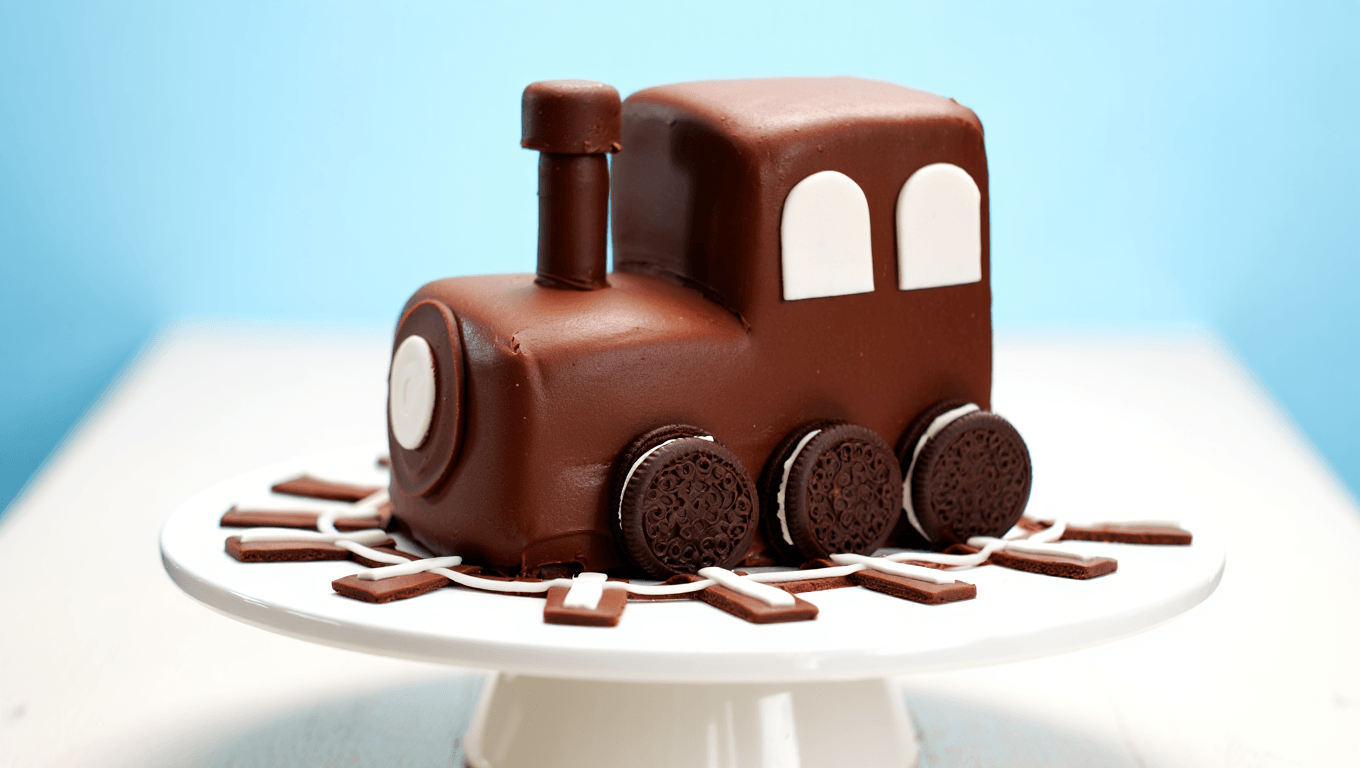
When your little one learns to say their first word and it’s “choo-choo,” you know you are dealing with a full-blown train fan. That was the scene in our home when cartoons, a steady diet of toy locomotives, and a love for a certain piggy family collided to create one ambitious birthday idea: a multi-car chocolate train filled with smiling pig characters.
Picking the perfect theme: trains meet cartoon favorites
Young children build strong attachments to characters and objects. For many kids, trains and programs like Peppa Pig become more than shows. They shape playtime, clothing choices, and even birthday themes.
Choosing a theme that reflects a child’s passions makes the party feel personal. It also sets clear goals for cake design, decorations, and party favors.
Visualizing the Choo Choo Chocolate Birthday Cake
In our plan, each element had to echo those favorite shows. The train was central. The wagons would be chocolate. Little pig figures would sit in the carriages.
Choo Choo Chocolate Birthday Cake stayed the working title. The challenge was turning a simple chocolate cake into a multi-car dessert that looked playful and stayed stable.
Key design choices
- Use dense chocolate cake layers for structure.
- Carve each cake into separate “wagons” rather than stacking one tall cake.
- Cover decorations with colored fondant for clean, toy-like shapes.
- Keep edible elements large enough to avoid choking hazards.
Shopping list and tools every parent needs
For ambitious themed cakes, planning saves time. I gathered supplies over two shopping trips.
- Chocolate cake mix or ingredients for a dense homemade chocolate cake.
- Buttercream for filling and crumb coat.
- Fondant in several colors (red, blue, pink, black, white).
- Modeling tools, rolling pin, and small cookie cutters.
- Food-safe wooden dowels and a serrated knife for carving.
- Edible glue or a thin syrup for attaching fondant pieces.
Step-by-step: building each chocolate wagon
Breaking the process into short tasks makes the project manageable. Do small steps over two days if possible.
- Bake two or three dense chocolate sheet cakes. Chill fully before cutting.
- Cut the cakes into rectangular “cars.” Trim edges so each car sits evenly.
- Stack thin layers with buttercream, then chill to firm up the structure.
- Carve rounded edges to suggest wagon shapes, keeping proportional sizes.
- Add a thin crumb coat of buttercream and refrigerate.
- Roll colored fondant and cover each car, smoothing seams with a fondant smoother.
- Create wheels, eyes, and other small parts with fondant or pre-made candy.
- Attach pigs and details with edible glue. Use dowels to secure cars together if needed.
Tips for modeling pig characters
- Form basic body shapes first; add snout and ears second.
- Use tiny balls of black fondant for pupils and nostrils.
- Work with slightly sticky fondant for adhesion, or use a dab of water.
- Make several spare pieces in case a figure breaks during handling.
Practical shortcuts that save time and stress
When you’re not a professional decorator, smart shortcuts help. Here are options we used or considered.
- Buy a pre-colored fondant to skip dyeing sugar paste.
- Use simple store-bought sugar figures if sculpting feels too hard.
- Make the cake base a day in advance and keep decorations separate.
- Use chocolate bars or candies as quick wagon wheels.
- Enlist a helper for one task, like rolling fondant or cutting shapes.
Common problems and fixes for at-home cake makers
Even with a plan, expect surprises. A few things that derailed us—and how we fixed them.
- Fondant tearing: smooth with a little water or patch with a thin fondant strip.
- Wobbly wagons: add internal supports like dowels or thicker cake layers.
- Restless little helpers: give small tasks like placing candies to keep them involved.
- Time running out: switch to larger, simpler decoration pieces to speed assembly.
How to arrange the train on the party table
Presentation matters. We placed the wagons on a long board covered in edible “track” made from crushed cookies. A narrow chocolate strip served as the rail.
- Place the locomotive at the front and stagger wagons for depth.
- Leave space for candles and for the birthday child to reach the cake.
- Use cake boards under each car if you need to transport them separately.
Timing and labor: how long each step takes
Realistic timing keeps stress low. Below are approximate times for a three-wagon chocolate train.
- Baking and cooling: 3–4 hours total.
- Crumb coat and chilling: 1–2 hours.
- Fondant sculpting and decorating: 4–6 hours, spread over two days.
- Final assembly: 30–60 minutes.
The moment that made it all worthwhile
When the cake was finally on the table, the room grew quiet. My son, Marco, blinked at the colorful locomotive and squealed with delight. Hearing him shout, “Choo choo!” and watching his eyes light up wiped away every mishap from the previous days.
Similar Posts:
- penguin cupcakes: easy step-by-step tutorial for adorable party treats
- Man’s Stubborn Cake Choice Sickens Girlfriend: Refuses to Apologize!
- The ultimate gooey chocolate cake recipes you need to try now
- Easter Delight: Indulge in the Ultimate Cheesecake Cake!
- Chocolate cake so decadent you’ll say OMG

Health advocate and wellness researcher, Dr. Monroe brings clarity to confusing health trends with science-backed advice. Her mission is to help readers live vibrantly, from the inside out.