
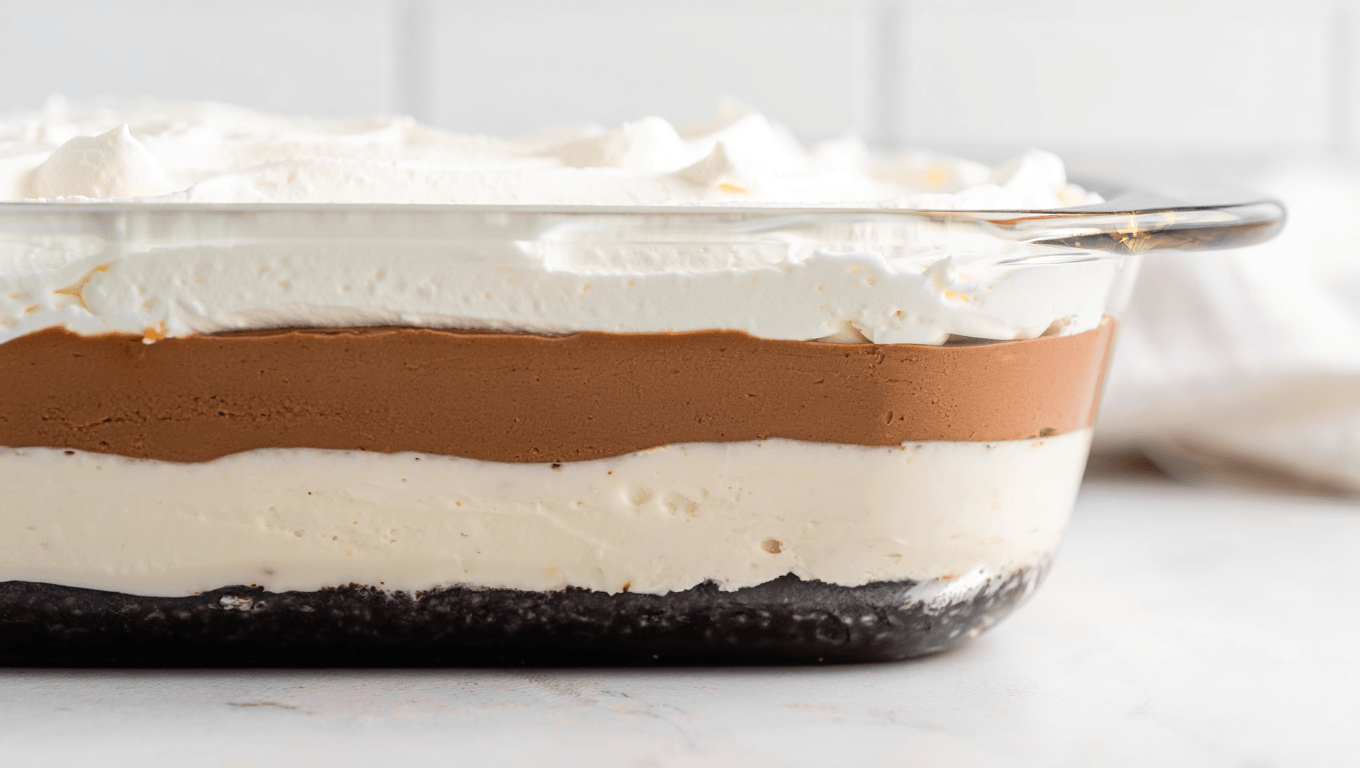
Rich, layered, and effortless to assemble, Chocolate Lasagna has become a staple for chocoholics who want maximum flavor with minimal oven time. This no-bake dessert stacks an Oreo crust, a creamy cheesecake layer, silky chocolate pudding, and a cloud of whipped topping. It’s the kind of treat that disappears fast at parties and looks elegant on the table.
How I picked one chocolate to rule them all — and found Chocolate Lasagna
I was scrolling dessert boards and playing a silly mental game: if I were stranded on a desert island, which chocolate dessert would I bring? The contenders lined up in my head. Dark chocolate cheesecake. Gooey brownies. A proud chocolate pie. Each had a case.
Then Chocolate Lasagna burst onto the scene and made a convincing argument. Layers, texture contrasts, and easy prep — all in one pan. It felt like a chocolate medley that could survive any dessert isolation. That curiosity turned into a kitchen experiment, and the result became an instant favorite.
Essential facts and why this recipe works for gatherings
- Method: No-bake — no oven required.
- Prep time: About 25 minutes active.
- Total time: Chill for 1 hour in the freezer or 4 hours in the fridge.
- Yield: Roughly 24 small pieces, depending on how you cut it.
- Category: Dessert — ideal for potlucks and holiday trays.
Ingredients for an easy Chocolate Lasagna with Oreo crust
Gather these pantry-friendly items before you start. Quantities are for a 9 x 13-inch pan.
- 36 Oreo cookies (regular, not Double Stuf)
- 6 tablespoons butter, melted
- 8 ounces cream cheese, softened
- 1/4 cup granulated sugar
- 2 tablespoons cold milk
- 12 ounces Cool Whip, divided
- 2 packages (about 2 to 3.9 oz each) chocolate instant pudding mix
- 3 1/4 cups cold milk for the pudding
- 1 1/2 cups mini chocolate chips
Step-by-step: Build the no-bake Chocolate Lasagna
- Pulse the Oreo cookies in a food processor until you have fine crumbs.
- Combine crumbs with the melted butter. Press the mixture firmly into the base of a 9 x 13-inch dish to form a compact crust.
- Chill the crust in the refrigerator while you prepare the layers.
- Beat the cream cheese until smooth. Add sugar and 2 tablespoons cold milk. Mix well until creamy.
- Fold about 1¼ cups of Cool Whip into the cream cheese mixture until light. Spread this over the chilled crust.
- Whisk the chocolate pudding mixes with 3¼ cups cold milk until the pudding begins to thicken. Let it rest a few minutes.
- Spread the pudding on top of the cream cheese layer in an even layer.
- Allow the pudding to set for about 10 minutes at room temperature so it firms slightly.
- Top with the remaining Cool Whip, spreading it smoothly. Sprinkle mini chocolate chips across the surface.
- Chill in the freezer for 1 hour or refrigerate for 4 hours before slicing and serving.
Tips, topping ideas, and easy variations
Small changes make big flavor differences. Use these ideas to adapt the recipe.
- Toppings: Add grated chocolate, chopped nuts, or a drizzle of hot fudge.
- Texture: Swap mini chips for crushed candies for more crunch.
- Flavor swaps: Try vanilla pudding in place of chocolate for a different contrast.
- Make-ahead: Assemble the day before and keep covered in the fridge for easy entertaining.
- Freeze shortcut: If short on time, the freezer firms layers faster. Move it to the fridge 30 minutes before serving.
Portioning and nutrition at a glance
Each slice is rich but portion-friendly. A typical serving is one small piece. Approximate nutrition per piece:
- Calories: ~230
- Fat: ~14 g
- Sugar: ~20 g
- Carbohydrates: ~24.5 g
- Protein: ~3.5 g
Storage advice
- Keep leftovers covered in the fridge for up to 3 days.
- For longer storage, freeze for up to 2 months. Thaw in the fridge before serving.
Similar Posts:
- Easter chocolate lasagna: decadent no-bake dessert to wow your guests
- Hot chocolate lasagna recipe: decadent no-bake dessert you need now
- Baileys chocolate lasagna recipe: the boozy dessert everyone’s obsessed with
- Irresistible Chocolate Peppermint Lasagna: No-Bake Christmas Treat!
- white chocolate blueberry lasagna: creamy layered dessert that steals the show

Health advocate and wellness researcher, Dr. Monroe brings clarity to confusing health trends with science-backed advice. Her mission is to help readers live vibrantly, from the inside out.