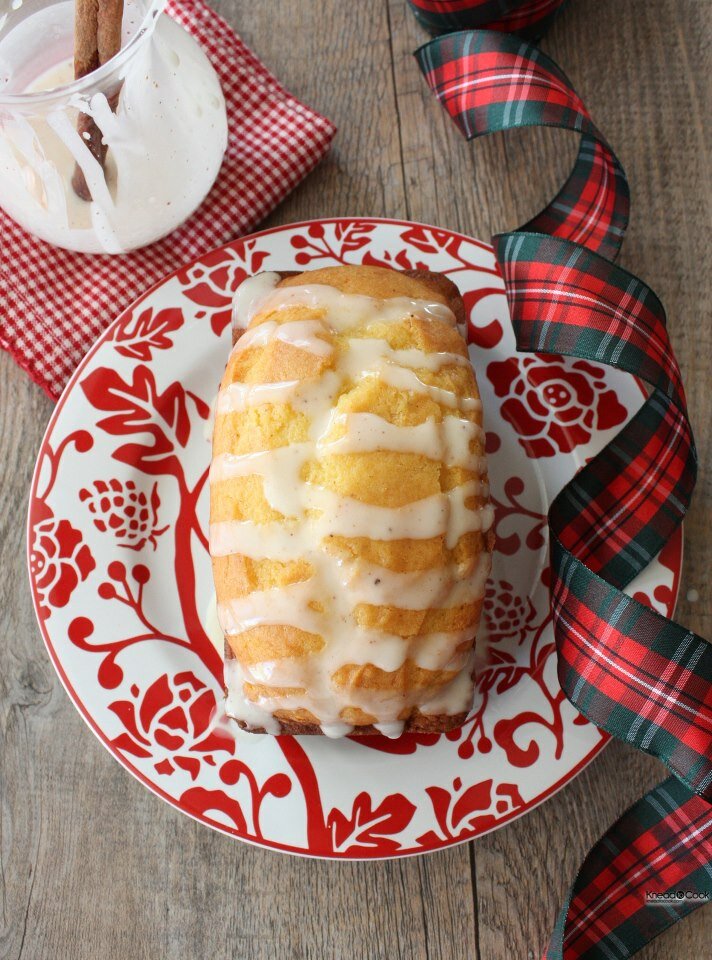
Caramelized vanilla blondies.

These blondies are perfect for baking and holiday gift-giving. They have a caramelized flavor making them irresistible. Not clean-eating by any stretch of the imagination but everything in moderation. With a husband who is allergic to chocolate (yes, gasp!) these are the perfect treat. I’ve had this recipe for about 20 years – my little stained index card. A true favorite I always make around the holidays. Flaky tops. Ooey gooey centers, does it get any better? Commence drooling.
So in my house, I always try to have a wide variety of “treats” for my kids and I made protein bars yesterday… today I knew I had to make a fun sweet for an after-practice/dinner dessert option. Perfect wrapped up in a cellophane bag with a plaid ribbon. Pay a bit of happiness forward and make someone’s day extra special or eat them all yourself and then hit the gym hard tomorrow…. it’s your choice!
Ingredients:
1 cup + 2 tablespoons of all-purpose flour (I use King Arthur)
1/4 teaspoon sea salt
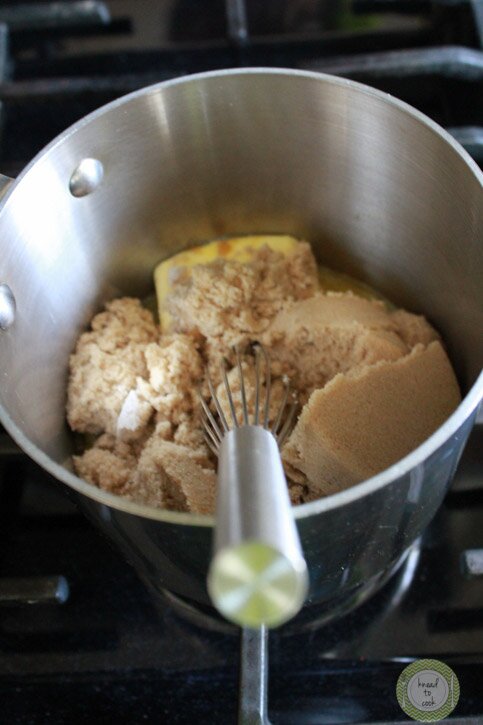
4 ounces of really good butter (I use Kerrygold) – measures about 1/2 cup at room temperature
1.5 cups of light brown sugar
1 egg + 1 yolk, room temperature
2 teaspoons of vanilla paste or extract (or 1 tsp of extract and 1/2 inside of a vanilla bean)
Directions:
Preheat the oven to 350 degrees and spray your 8×8 glass baking dish with baking spray with flour. Set that aside. Sift the flour and sea salt together. Set aside. Into your stand mixer with paddle attached, blend the egg, yolk and vanilla. In a saucepan melt your butter and brown sugar. Whisk until melted.
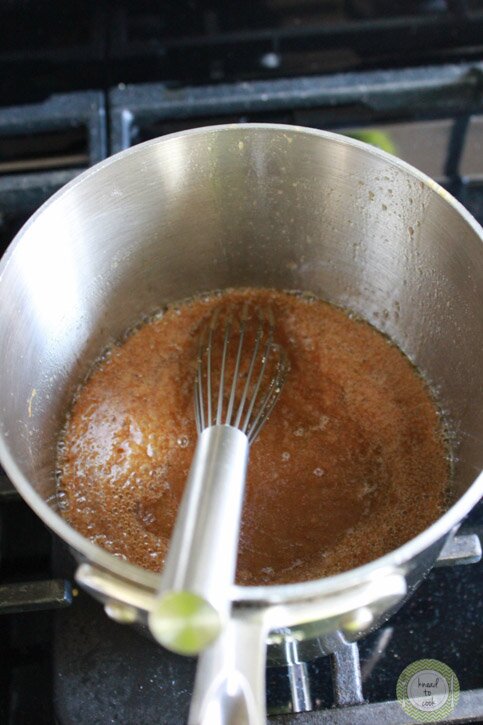
Cook until it boils and keep on whisking for 30 seconds to 1 minute. It will start to caramelize. Then remove from the heat source and let cool completely. Add to the egg mixture once cooled and blend. Then add the sifted ingredients. Blend. Scrape the bowl down once and blend again. Pour into your prepared pan and bake for 25 minutes. Insert a toothpick to test if the blondies are done. If it comes out clean, remove and let cool prior to slicing. If the toothpick is still wet, bake for an additional 4-6 minutes and retest. I prefer to undercook for an extra gooey texture.
— Knead to Cook
Can this recipe be doubled?
I haven’t doubled it and only make one batch at a time however the way the fly out of my kitchen I should. I will report back 🙂
great idea! these look amazing!
Thanks so much for this recipe which I found when you were still posting on FB–I miss you in my newsfeed! At any rate, my husband who needs non-chocolate snacks in the evening absolutely loved these. I inhaled a few myself. I couldn’t find the butter you recommended in my local grocery store so just used what I had and these were absolutely divine. I’ll be adding this to my “repeat often” list.
Melinda, Oh I’m so glad and my husband is allergic to cocoa and can’t have chocolate. Pop back daily or sign up for my newsletter. I post recipes daily 🙂 oxox
hi, these look amazing and sound wonderful. Could you share how you melt the 4oz of butter with the 1 and 1/2 cup of brown sugar. Both times I have tried it now I seem to do something wrong.it seems like the while some sugar is getting hot too quickly, some is still not melted in. Then, when I have it all finally melted it’s smells like it’s burning. I am whisking away at it all the while. Tonight when I poured the contents into the mixing bowl the butter brown sugar hardened into lumps. I would love some help, if you have any to offer. Thank you!
Amy, that’s so odd! I’ve never had an issue. Are you using fresh brown sugar (soft and pliable) and using real (better quality) butter? Try it heat over low heat and whisk constantly. Low heat may be the key. Let me know how it goes. Robin oxo